The Essential Guide to Walking the Larapinta Trail (2024)
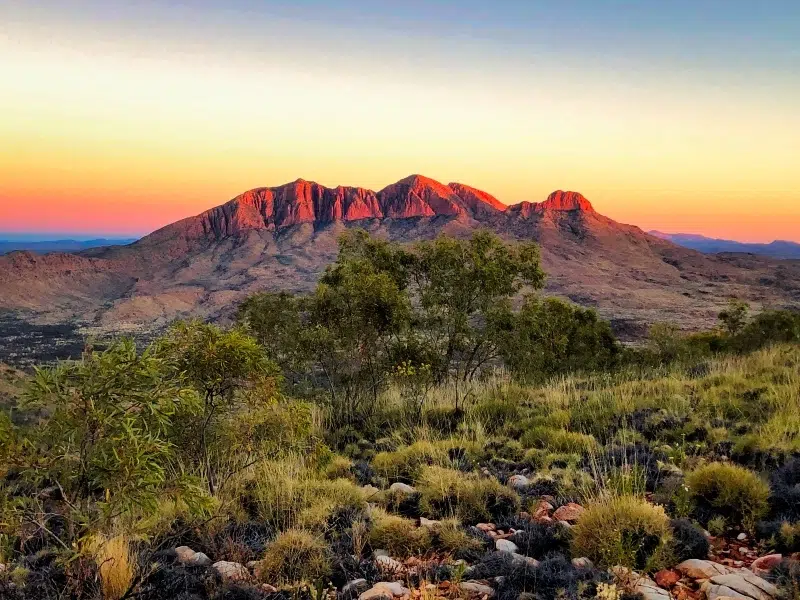
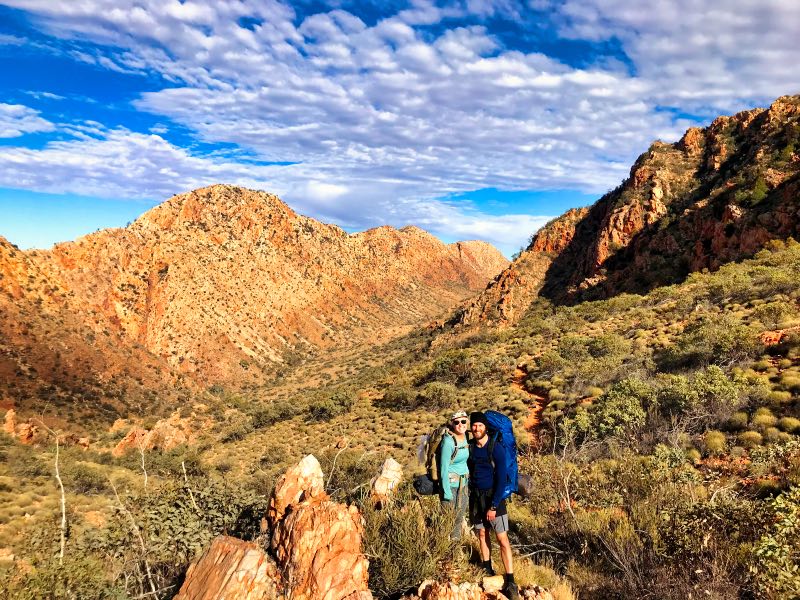
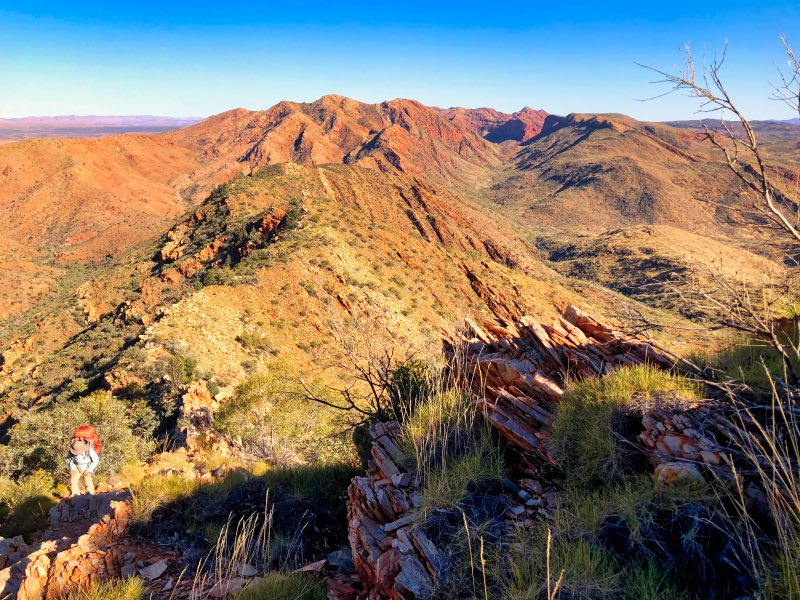
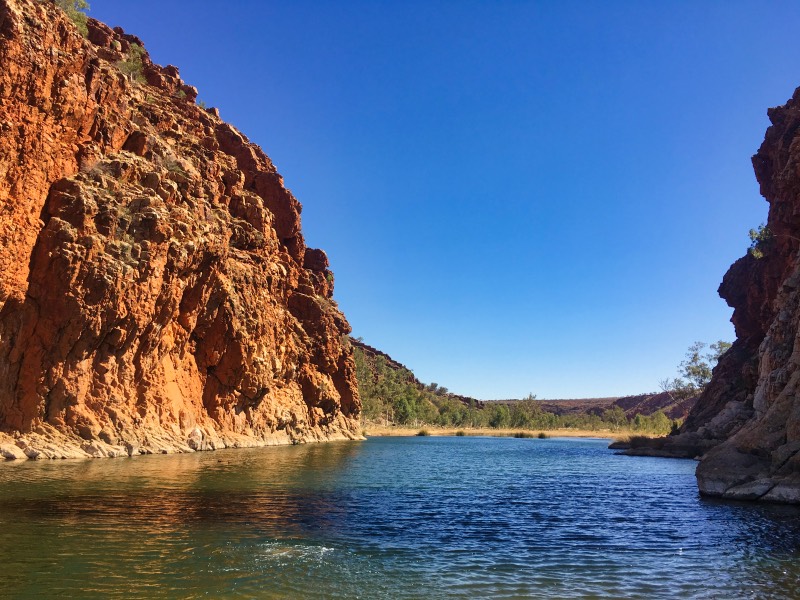
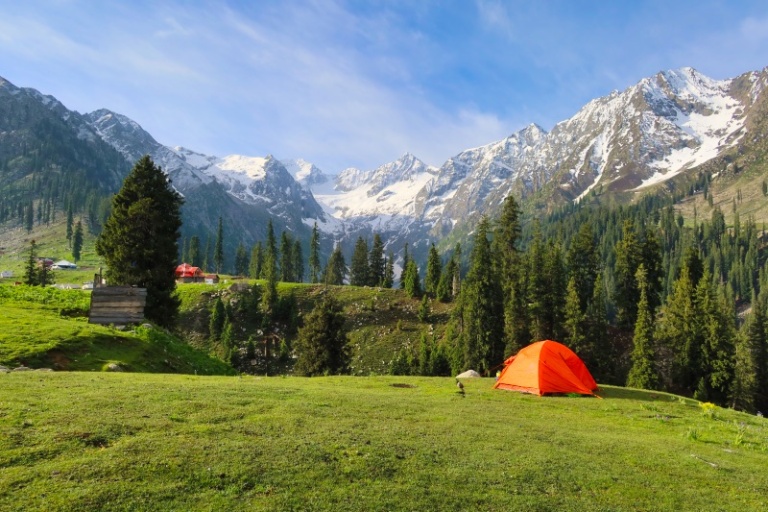
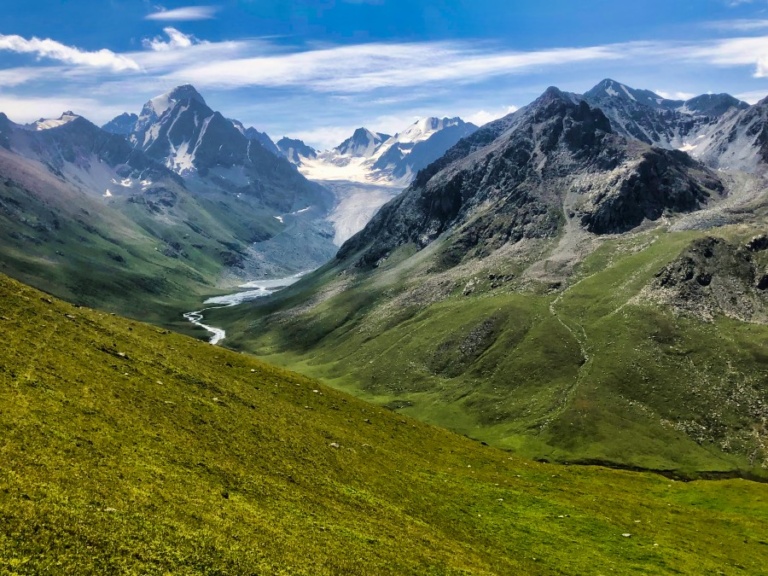
The rolling hills of the West MacDonnell Ranges. Endless desert vistas. Ancient waterholes. Night skies filled with more stars than you could ever imagine. The Larapinta Trail is nothing short of extraordinary.
Running like a spine through Central Australia, walking the Larapinta Trail is a once-in-a-lifetime experience and one that will stay with you forever. It has for me.
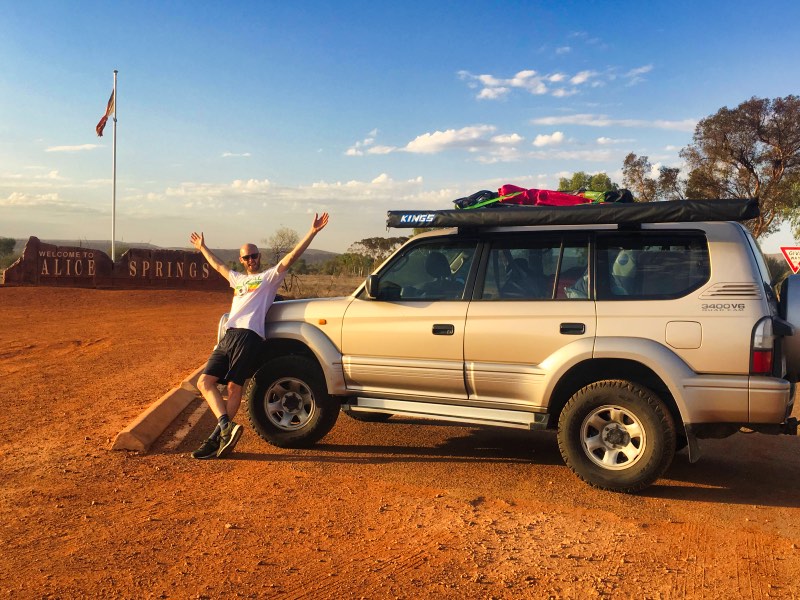
We lived in Alice Springs for 2.5 years and spent many weekends chipping away at the Larapinta Trail section by section. Then I (Dotti) walked the Larapinta Trail end-to-end (E2E) solo in August 2021. To this day, it is still one of the best things I have ever done.
I’ve walked almost all of the sections of the Larapinta Trail twice and in both directions. I’ve spent countless hours in the West MacDonnell National Park. I know the area intimately and it is very close to my heart.
From these experiences, we’ve written the most comprehensive guide to the Larapinta Trail that you can find on the internet.
Whether you’re getting ready to embark on a complete Larapinta walk or are just doing some preliminary research, read on for our essential guide to walking the Larapinta Trail, which contains everything you need to know before you head out on a fantastic adventure.
Australia Travel Resources
- Getting there: search for flights to Australia
- Guidebook: pick up a Lonely Planet Australia guidebook
- Where to stay: search for hostels and hotels
- Getting around: search for buses
- Rent a car: search for deals on car rentals
- Travel insurance: get travel insurance for your trip
- Money: get a Wise travel card to save big time
The Larapinta Trail Overview
- Location: Tjoritja / West MacDonnell National Park, Northern Territory
- Length: 230 kilometres (split over 12 sections)
- Time: Variable. From 7 days / 6 nights to 16 days / 15 nights. Most commonly walked over 14 days / 13 nights
- Season: Best walked from May – September
- Type: One-way hiking
- Walking options: Independent, self-guided end-to-end, multi-day sections, guided treks and day hikes
- Booking Required: For overnight walks only
- Permit Cost: $25 AUD per day up to a maximum of $125 AUD
- Sleeping: Camping
- Gateway Town: Alice Springs
- Start: Telegraph Station or Redbank Gorge
- Finish: Redbank Gorge or Telegraph Station
- Difficulty: Moderate to demanding
- What to expect: The spectacular ancient hills of the West MacDonnell Ranges, sandy creek beds, the occasional (freezing cold) waterhole, and magnificent and varied desert scenery
The Larapinta Trail Location
The Larapinta Trail is located just outside of Alice Springs in central Australia. Alice Springs is almost 1500 km south of Darwin (the capital of the Northern Territory). This is the middle of Australia’s beating red centre heart.
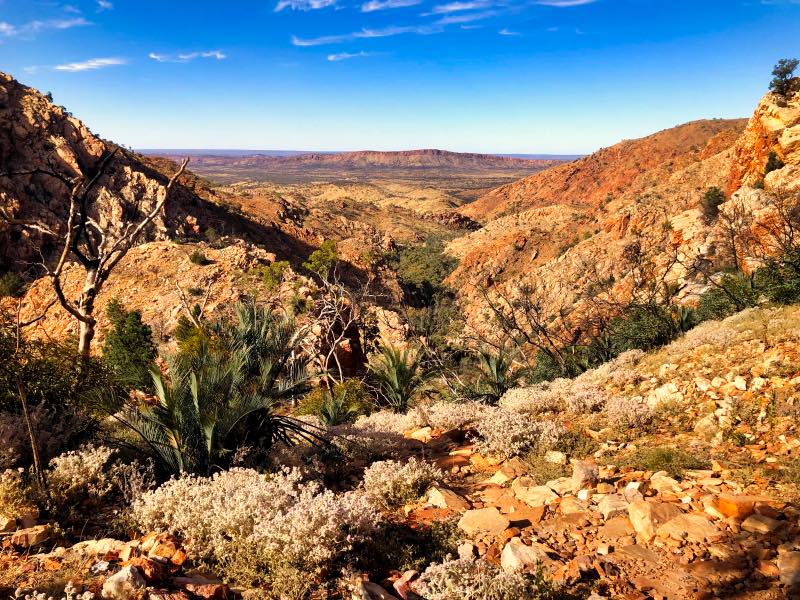
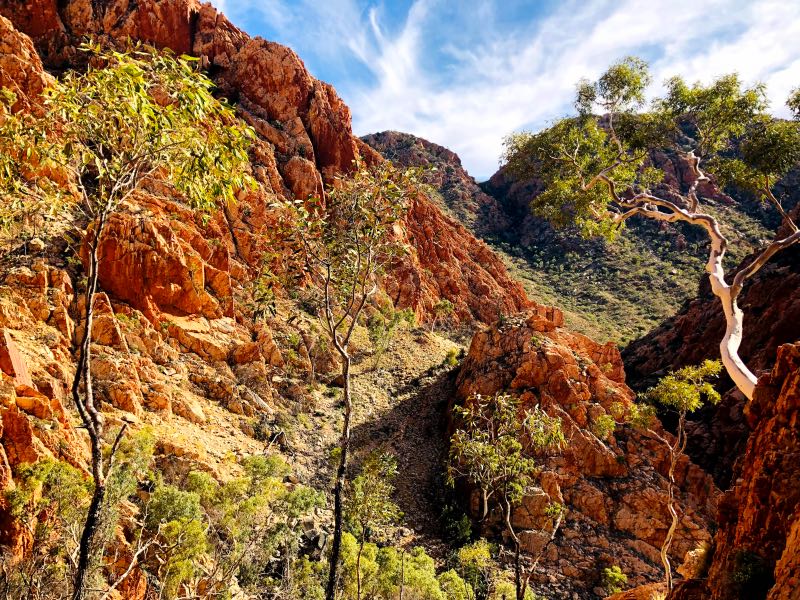
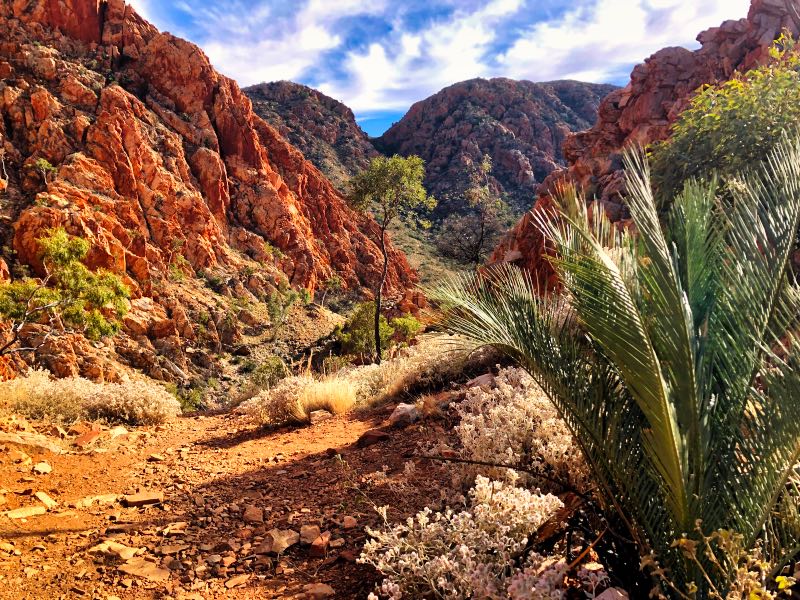
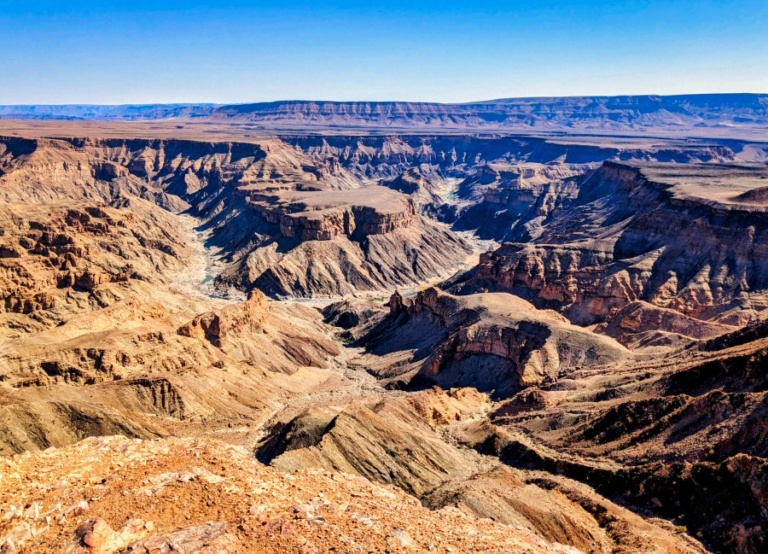
We’re talking Outback Territory here – think red dirt, plenty of spinifex, vast vistas and the most epic sunsets you’ll ever witness.
Read about the Rwenzori Mountains, the best hike in Africa
Culture
The Larapinta Trail is located on the traditional lands of the Arrente (pronounced Ah-runda) people, who have generously provided the opportunity to explore the ancient landscape of the West MacDonnell Ranges (Tjoritja in Arrente).
Arrente history in Tjoritja dates back over 40,000 years and is one of the longest-continuing cultures on the planet. For the Arrente people, culture is deeply intertwined with the land and many places here have special significance.
Looking for more great Australian hikes? Check out our Ultimate Guide to the Jatbula Trail
The Trail
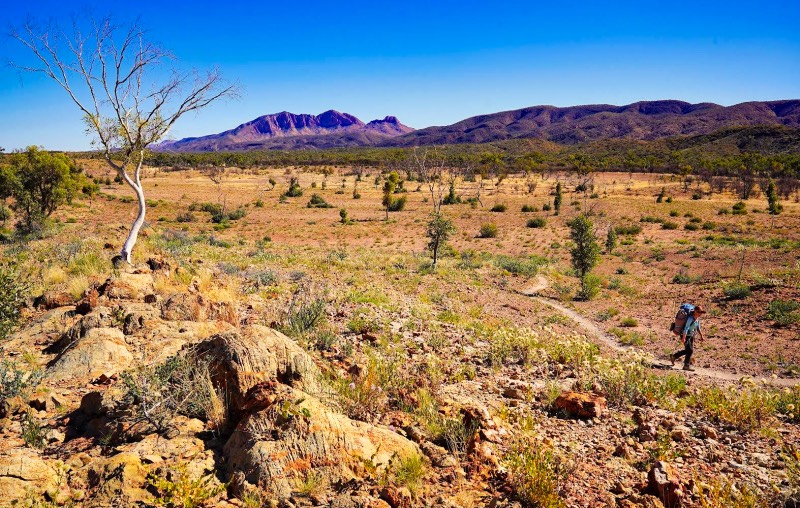
The Larapinta Trail is comprised of 12 sections, each taking either one or two days to complete. The trail is one way, starting at Telegraph Station in Alice Springs and finishing at the summit of Mt Sonder, the highest point of the trail.
The Larapinta Trail traverses a beautiful section of the West MacDonnell Ranges and includes some of Central Australia’s biggest highlights, including Ormiston Gorge, Mt Sonder, Ellery Creek and Count’s Point, amongst many others.
You can walk the Larapinta Trail in an endless amount of variations: from the complete Larapinta walk end to end to just a day walk on a single section. The sky’s the limit.
In this article, we’ll discuss walking the Larapinta Trail end to end (E2E), but all the information is still applicable if you’re just bagging a few sections over a weekend.
Spending time in Melbourne? Check out our article on the Top 10 Coolest Suburbs in Melbourne
Walking the Larapinta Trail: Which Direction?
Whilst the Larapinta walk is traditionally done east to west (Telegraph Station to Mt Sonder), you can also walk the Larapinta Trail from west to east.
I’ve done almost every section east to west and when I did the Larapinta Trail walk E2E, I walked west to east. So I’ve seen pretty much every section from both directions.
Which direction should you choose? There’s not a huge difference, really. They’re both stunning and offer different perspectives on the area.
Walking east to west, you’ll have views of Mt Sonder growing larger each day, which is very beautiful.
If you choose to walk the Larapinta Trail from west to east, then your logistics are easier. You just have to arrange a drop-off at Redbank Gorge and then you have the luxury of walking back into town (instead of having to sit through a 2.5-hour car ride back when you’re tired, smelly and just want a cold drink).
Larapinta Trail Hiking season
The season for walking the Larapinta Trail is from May to September.
Whilst you can theoretically do the Larapinta walk outside this time, it is highly inadvisable due to the extreme heat the region experiences over the summer period.
We lived in Alice Springs for two years and trust us, it is deadly hot in summer. We can’t even imagine going for a day walk during this time, let alone an overnight hike. The blistering heat of the desert is unforgiving.
Important: while some people attempt to do the Larapinta walk over the summer, this is not at all advisable and there have been fatalities.
Best time to walk the Larapinta Trail
The best time to walk the Larapinta Trail is between June and August. During this time, you can expect the days to be sunny and mild. The evenings can get quite cool and drop below zero. The days will almost certainly be clear and the temperatures will be ideal for long days on the trail.
Looking for another epic hike? Read about the Ak Suu Traverse in Kyrgyzstan
How to book the Larapinta Trail
All people wanting to walk the Larapinta Trail must book a walking permit and their campsites in advance.
To walk the Larapinta Trail independently, you must book your walking permit and your campsites in advance here. We haven’t used this system, but reports are that it functions decently and that it doesn’t seem to be too difficult to get a spot on a given date.
When you book online, you need to print the receipt/permit with the unique reference code and bring it with you on your Larapinta walk.
Theoretically, rangers regularly visit campsites to check for permits and if requested, you must present your permit to them. In reality, there are only rangers stationed at Simpsons Gap, Ormiston Gorge and Redbank Gorge.
For those doing the Larapinta walk with a tour, there are multiple operators to book with. Walking the Larapinta Trail in this fashion provides unlimited options in terms of distance, difficulty and level of comfort. Trek Larapinta and Trek Tours Australia are two of the most popular companies offering guided Larapinta walks.
How much does the Larapinta walk cost?
If walking the Larapinta trail independently, it is not overly expensive. Anyone walking the Larapinta Trail overnight must pay a walking fee and a campsite fee for each night.
Larapinta Trail Walking Trail Fee
The Walking Trail Fee is $25 AUD per night (per person), up to a maximum of $125 AUD for 5+ nights. What this means is that if you walk the Larapinta trail for more than 5 nights, you pay a maximum of $125 AUD.
Larapinta Trail Camping Fees

Almost all of the campsites on the Larapinta Trail are Category B campsites, which cost $10 AUD per night.
There are three Category D campsites along the Larapinta Trail. These cost $20 AUD per night and include:
- Ellery Creek South
- Ormiston Gorge
- Redbank Gorge (Vehicle-based campsites)
Standley Chasm is a private business and costs $18.50 AUD per night to camp and includes entry to the Chasm. They also provide a food drop service (see below).
The exact amount you will pay will depend on how long you take to walk the Larapinta Trail and where you camp. Because of all this variation, it is difficult to provide an exact amount of how much it will cost to walk to the Larapinta Trail.
If you’re doing the Larapinta walk over 14 days and 13 nights and stay at all 3 of the Category D campsites, you can expect to pay:
- $125 AUD per person in walking fees;
- $90 AUD per person in camping fees for 9 nights at Category B sites;
- $60 AUD in camping fees for one night each at Redbank Gorge, Ormiston Gorge and Ellery Creek South; and
- $18.50 AUD per person in camping fees for one night at Standley Chasm.
This comes to $293.50 AUD in total.
Therefore, the average individual walking the Larapinta Trail can expect to pay between $250 – $300 AUD per person in fees. Note that this does not include transportation fees, food or food drops.
Considering the quality of the trail and the facilities, this is still very good value.
Transportation to the Larapinta Trail
No matter which direction you walk the Larapinta Trail in, you first need to get to Alice Springs.
Alice Springs is a very remote town in the centre of Australia, so to get there, most people fly. Otherwise, you are looking at least a couple of days of driving.
Alice Springs has a relatively well-serviced airport, with flights to and from many other destinations in Australia. You may not have a lot of choice, but you should be able to come from almost anywhere in Australia. The downside is that flights to and from Alice Springs are usually pretty expensive.
For the best deals, we recommend looking on Skyscanner well in advance.
Pro tip: to get to Alice Springs on the cheap, use frequent flyer points if you have them. Because points are calculated on the distance covered, you actually won’t use that many and you will save LOTS of money. This is how we travelled out of the region when we lived there.
If you are coming from overseas, the closest international airport is in Darwin.
How to get to the start of the Larapinta Trail
Once you are in Alice Springs, getting to the start of the hike will depend on which direction you are walking the Larapinta Trail in.
If you are starting the Larapinta walk at Telegraph Station, it is easy to get to the start. Telegraph Station is located directly in town, so you can either walk there or take a taxi.
If you are walking the Larapinta Trail from west to east, you will need to arrange transportation to the trailhead. Mt Sonder is located within Redbank Gorge and is approximately 155 km from Alice Springs. The drive takes about 2.5 hours and there is no public transportation.
If you have a friend in town or with you that is not doing the hike, then you can just get them to drop you off! (Thanks Zandy).
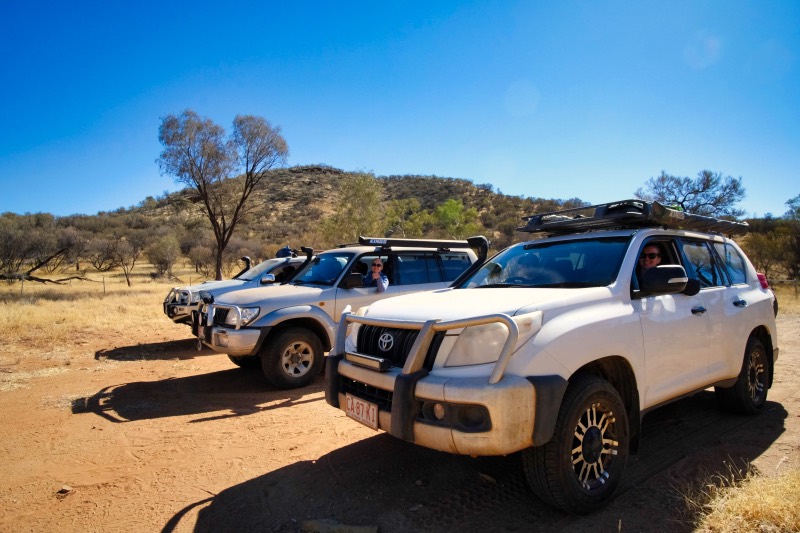
If you don’t have a super supportive life partner close by to help you out, Larapinta Trail Trek Support (LTTS) runs fixed transfers throughout the day and can drop you off at any trailhead. A drop-off at Redbank Gorge costs $400. LTTS does heaps of technical support for people walking the Larapinta Trail, and you’ll hear more about them below.
100% Adventure also runs trail drop-offs at a much cheaper rate of $115, however, these tend to book out quite early.
How to leave the end of the Larapinta Trail
If you walk the Larapinta Trail from east to west you need to arrange for someone to pick you up at the end. You can either have someone you know in town pick you up. If this is not an option for you, both LTTS and 100% Adventure can pick you up at Redbank Gorge.
Is hitchiking an option? Not really. We hitchhike a lot, including when we finished the Jatbula Trail, but we don’t recommend it here. We’ve driven on this road hundreds, if not thousands, of times and there’s just not a lot of traffic on this road and you may likely be stuck. You could be lucky, but it’s a long shot.
If you do the Larapinta walk west to east, then you will finish at Telegraph Station. From there, you can walk to your accommodation or call a taxi.
What to expect on the Larapinta Trail
What is the weather like on the Larapinta Trail?
The weather on the Larapinta Trail depends on which season you hike in.
If you walk the Larapinta Trail during the main season, May to September, the weather will be clear and sunny. You can expect sunshine every day, with temperatures ranging from 12C to 27C.
The nights will be cold and can drop below zero. You should bring warm thermals and a sleeping bag that is rated for temperatures lower than -5C. See our packing list below.
Outside of this season, temperatures will be above 40C and unbearable. For this reason, we do not recommend doing the Larapinta walk in the off-season.
How hard is the Larapinta Trail?
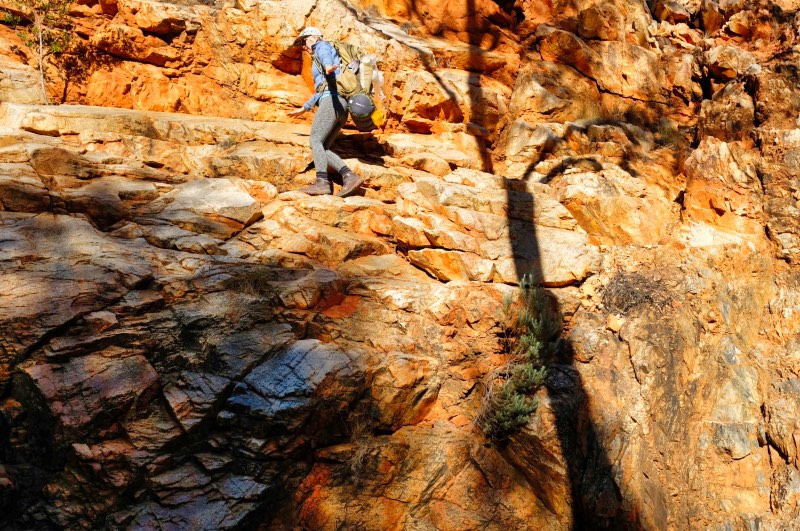
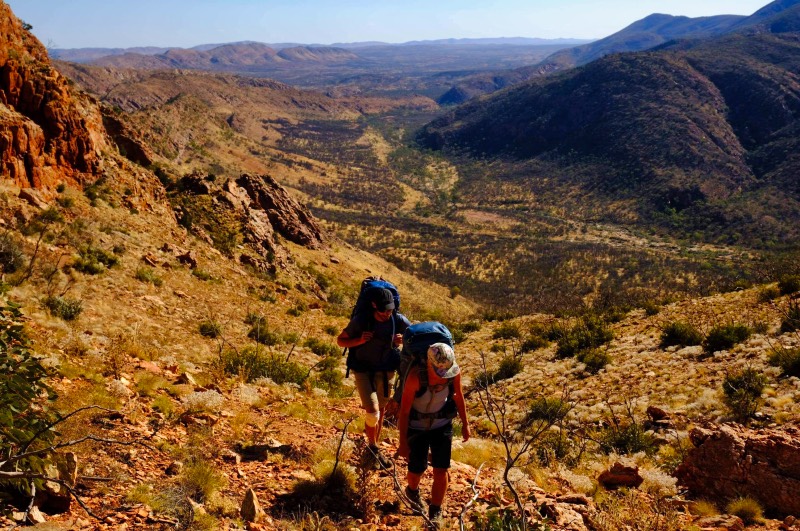
There’s no way around it: walking the Larapinta Trail is challenging. There is a combination of factors that make the Larapinta walk a demanding endeavour.
Firstly, the terrain is difficult. It is mostly rocky and hard terrain, which can destroy your feet. In all my hiking around the world, I have never had problems with blisters EXCEPT FOR the Larapinta Trail. Blister first aid is important. Wear double socks and treat hot spots as they arise.
Secondly, the conditions of the Larpinta Trail are challenging. Even in winter, it can be quite warm during the day and there is little to no shade for the vast majority of the Larapinta Trail. You will be in the sun for most of the hike.
Third, there is a lot of undulation on the Larapinta trail. There are some big climbs (notably up to Mt Giles Lookout and Brinkley Bluff), so be prepared to gain some elevation.
Fourth, it is LONG. Two weeks of walking every day, for many hours, is a long time.
Water on the Larapinta Trail
Water scarcity is an issue when walking the Larapinta Trail and carrying enough adequate water is something you must take very seriously. Do not underestimate the dry, desert conditions.
It is essential that you understand how far you must walk each day without access to water and plan accordingly. Always carry extra water with you in case of an emergency.
Surface water availability on the trail depends on how much rain the region has received that year and can fluctuate greatly.
There are water tanks throughout the Larapinta trail, which are filled regularly by park rangers. They are usually filled up well before they empty, so you can expect to be able to access water at each trailhead with a water tank.
That said, there are many sections with long distances without a tank. Most notable is section 9, between Serpentine Chalet Dam and Ormiston Gorge. This is a 29 km stretch without access to water.
Most people split this section up to camp overnight at Mt Giles Lookout or Hermits Hideaway, where there is no water. If you are doing this section over 2 days, we recommend carrying at least 6L per person for the two days.
See the NT Park’s website for a list of all the water tanks on the trail.
Officially, you are recommended to treat all tank water before drinking it, but unofficially, the tanks are usually just filled with town water. It’s up to you and what you’re comfortable with.
We still recommend bringing tablets, or a water purification system, to treat any surface water you may come across, or if there are any issues.
Pro tip: for treating water on all our hikes, we use a Steripen – it’s a game-changer.
Food for the Larapinta Trail
One of the biggest challenges in preparing to walk the Larapinta Trail is planning out your food. You need to plan out 14 days of meals. That’s a lot!
Backcountry Meals are very popular, because they are light and easy to prepare, if not a bit expensive. These can be purchased in Alice Springs, at either Lone Dingo or through LTTS. Always call ahead to ensure there’s adequate stock, as supplies run low during peak season.
If you would like to prepare your own food, instant noodles, pouches of beans, chickpeas and tuna, couscous and instant pasta packages are all great options. Dehydrated peanut butter is amazing and can be found at Woolworths.
The biggest feedback we hear from people walking the Larapinta Trail is that they become tired of sweet flavours. Try to pack more savoury and salty options into your meals. Savoury snacks and nut mixes are great additions.
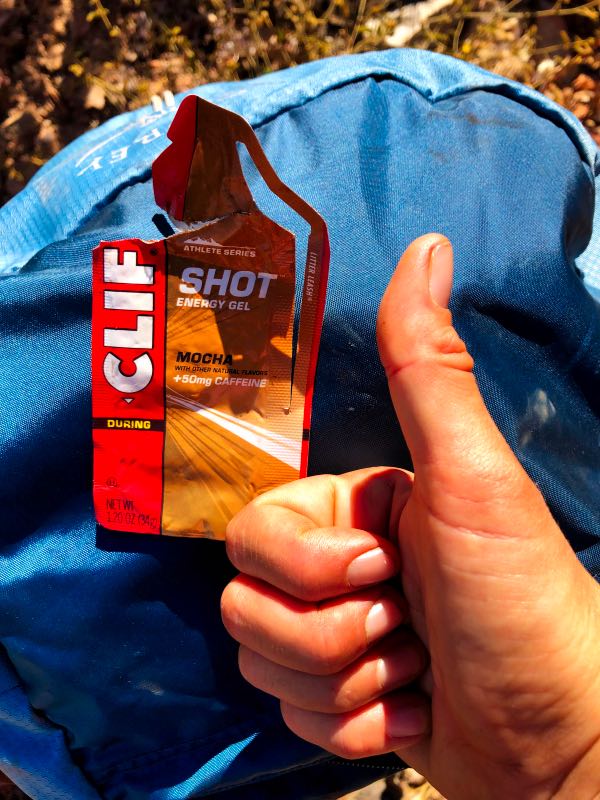
How much food to bring? Well, that’s a tough one. You always want to pack enough food in case of an emergency, but 95% of hikers I’ve met said they carried too much food.
Pro tip: individually packaged Babybel cheeses are amazing when hiking. If you place them directly under your water bladder, this keeps them cool and semi-refrigerated.
Food Drops
It is almost impossible for anyone to carry enough food for the entire Larapinta walk, so preparing food drops in advance is a necessity.
Food drops are most commonly arranged for Standley Chasm, Ellery Creek South and Ormiston Gorge. You can also arrange food drops for Serpentine Gorge, but note that the food drop facility is a very far walk from the campsite (about 1 km). Trust us, when you’re carrying your container back and forth, you won’t want to walk that extra couple of km.
There are two ways to prepare food drops for walking the Larapinta trail.

1. You can arrange for a company to organise your food drops for you
Larapinta Trail Trek Support (LTTS) is the go-to option.
When you arrange a food drop through LTTS, this includes rental of a 50L container. The food drop fee is $100 – $120 AUD per drop, per container. Most people will have three food drops throughout the trail, so it should cost around $300 AUD.
Note that if you are arranging your food drops through LTTS, you cannot leave anything behind except rubbish in the food containers.
You can also only organise food drops through LTTS as part of a transfer service or trek support package.
2. You can drop the food containers off yourself
This is only a practical option if you have some time in the area before and after your hike, or if you have a friend to help you out.
To organise your own food drops, you must arrange a key for the food drop facilities at Ormiston Gorge and Ellery Creek South. This can be hired from the Alice Springs Information Centre by giving them a call in advance. The rental fee for the key is $10 AUD and you must also provide a $50 AUD deposit.
You can also leave a food drop-off at Standley Chasm for $5 AUD. Since this is a privately run business, just bring it to the cafe and speak with whoever is working.
How to prepare a food drop:
- Get sealable containers. Big plastic tubs are ideal. You need to find a container that is sufficiently large for your needs and it needs to seal well – this means no cracks. This is to prevent little friends (i.e., mice!) from getting in and eating your food.
- Label them clearly with your name, and the expected date you will be arriving to retrieve the contents.
Once you have the key and your food drops are prepared, you must drop them off at the locations. Or, if you have a very nice friend in the area, have them drop them off for you as you’re walking. (You’ll need an extra key for this option).
One of the great advantages of organising your own food drops (besides cost) is that you will be picking up your containers after you have completed the Larapinta walk, so you can leave things behind in them as you walk. For example, I had a fresh shirt in my second food container, which I swapped out with the one I was wearing.
When you have completed walking the Larapinta Trail, you must retrieve your containers, return your key and get your $50 AUD deposit back.
Pro-tip for food drops: put in each box something special for that night, like a bag of chips, a can of peaches, a jar of curry sauce, or a bottle of Coca-Cola. Something that you would never be able to carry but that will feel like a dream treat when you get to camp.
Food on the Larapinta Trail
You can buy food at a few select locations on the Larapinta Trail.
- Standley Chasm: There is a great cafe at Standley Chasm, which sells all types of meals, drinks and ice cream! They’re open from 8.00 am to 5.00 pm every day except for Sunday, when they close at 2.00 pm.
- Ormiston Gorge: There is a small kiosk at Ormiston Gorge, open from 10.00 am to 3.00 pm. If you arrive during those hours or take a rest day at Ormiston Gorge, then you can grab some cold drinks, a coffee, a toasted sandwich or a pie.
- Glen Helen: Glen Helen is managed by Discovery Parks and there is a restaurant on site.
Rubbish
Pack it out! You must pack out all your own rubbish while walking the Larapinta Trail. Carry a few small bags (double bag it just in case of leaks) and carry it with you.
To relieve the burden, you can leave some rubbish behind in your food drop containers.
Pro tip: to minimise rubbish on the trail, decant as much as your food beforehand as possible.
Safety
Even though the Larapinta Trail has good facilities and a well-marked trail, it is still an exercise in isolation. We highly recommend walking with a personal locator beacon (PLB) or similar device in case of any emergencies. If you don’t want to purchase one outright, you can rent one from LTTS.
As with all hikes in Australia, you should be mindful of snakes and always carry a first-aid kit complete with snakebite bandage.
Travel insurance, as always, is essential. If something goes wrong, you want to be covered. Our preference is SafetyWing. Trust us, we’ve used a lot of travel insurance and they really are the best.
Navigation
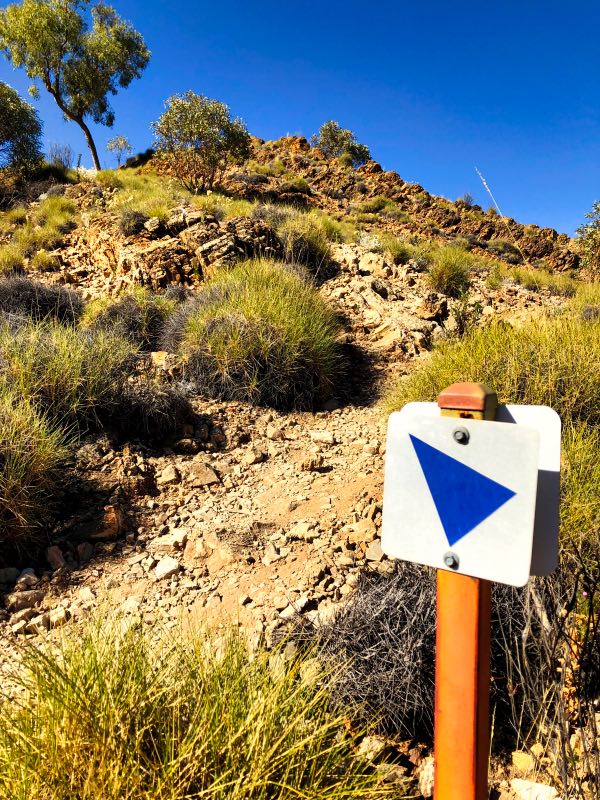
It is pretty easy to navigate the Larapinta walk. There are numerous, clear trail markers along the Larapinta Trail which are easy to follow.
The Larapinta trail markers are a blue triangle and include a distance in km. Depending on which way you are walking, this indicates either the km completed in that section or the km to go.
You don’t need a physical map, but it is a very good idea to download the maps.me trail in advance, as it can help you with some tricky spots (notably section 3).
Mobile Reception and Electronics
There is very limited mobile reception along the Larapinta Trail, so do not depend on it. You can normally only access it from a few high points.
Many shelters have USB charging points to charge your devices, but they’re popular and they can get slow with many devices plugged in.
We recommend bringing a power bank and charging it every few days.
Larapinta Trail Section breakdown
Section 1: Alice Springs Telegraph Station to Simpsons Gap
- Distance: 24.7 km
- Time: 7 – 9 hours
- Difficulty: Moderate
- Camping: Wallaby Gap and Simpsons Gap
Section 1 of the Larapinta Trail isn’t overly challenging, but it does cover a long distance with some steep ascents.
The steepest climb is up Euro Ridge, which has great views of the area and even includes Alice Springs. Some people do complete this section in a whole day, but most camp midway at Wallaby Gap, which you’ll arrive at just after Euro Ridge.
Continuing on, the next big climb is up Hat Hill Saddle. Just after this, you’ll descend to Simpsons Gap, a popular spot for day-trippers.
Note that you are not allowed to swim in Simpsons Gap.
Section 2: Simpsons Gap to Jay Creek

- Distance: 26.2 km
- Time: 7 – 9 hours
- Difficulty: Easy, but long
- Camping: Mulga Camp and Jay Creek
This is the most boring section on the entire Larapinta Trail. It is not particularly challenging, just long.
Because it is quite flat, you can do it in a day.
Otherwise, you can camp at Mulga Camp. I’ve camped here twice and enjoyed it. Most walkers overlook it, so it’s peaceful and quiet.
Section 3: Jay Creek to Standley Chasm

- Distance: 13.6 km
- Time: 5 – 6 hours
- Difficulty: Difficult
- Camping: Millers Flat and Standley Chasm
This is one of the most challenging sections of the Larapinta Trail.
Leaving Jay Creek can be quite confusing as you’re walking along a sandy riverbed and there aren’t a lot of trail markers. This is a good spot to navigate on your phone.
There are two route options on section 3: the low route and the high route. I’ve done both.
The low route, while still difficult, is much easier than the high route. The high route is incredibly challenging, traversing some of the steepest inclines on the trail. The descent from the high route is like scrambling down a mountain face.
Camping at Standley Chasm is a luxury, with hot showers, a good cafe and even laundry facilities!
Section 4: Standley Chasm to Birthday Waterhole
- Distance: 17.9 km
- Time: 8 – 10 hours. Most people camp overnight at Brinkley Bluff.
- Difficulty: Difficult
- Camping: Brinkley Bluff and Section 4/5 junction
Another challenging section on the Larapinta Trail.
This section follows the Chewings Range to the summit of Brinkley Bluff, a great place to camp when wind conditions are minimal. If the wind is blowing, consider camping elsewhere.
Section 5: Birthday Waterhole to Hugh Gorge
- Distance: 14.9 km
- Time: 7 – 9 hours
- Difficulty: Difficult
- Camping: Fringe Lily Creek and Hugh Gorge
This section goes along Razorback Ridge, one of my favourite parts of the Larapinta Trail.
You can walk further into Hugh Gorge to find some great swimming spots – highly recommended!
Fringe Lily Creek is a nice spot to camp but can get surprisingly busy and water availability is touch and go.
Section 6: Hugh Gorge to Ellery Creek South
- Distance: 28.9 km
- Time: 8 – 11 hours. You will need to camp overnight
- Difficulty: Moderate
- Camping: Ghost Gum Flat, Rocky Gully, Ellery Creek North and Ellery Creek Big Hole
This is one of the longest sections of the Larapinta trail and almost everyone breaks it up.
Ellery Creek South is a great place for a rest day, with a big, inviting waterhole and a food drop waiting for you!
You can hike via Ellery Creek North, but you don’t get access to the waterhole, or the convenient Ellery Creek South food drop, so we don’t recommend this option.
Section 7: Ellery Creek South to Serpentine Gorge
- Distance: 12.8 km
- Recommended time: 4 – 6 hours
- Difficulty: Moderate
- Camping: Serpentine Gorge
The terrain on this section is noteworthy for being gently undulating, which is a nice change after the earlier days on the Larapinta Trail.
Section 8: Serpentine Gorge to Serpentine Chalet Dam
- Distance: 13 km
- Time: 4.5 – 6 hours
- Difficulty: Moderate
- Camping: Counts Point and Serpentine Chalet Dam
This is one of my favourite sections of the entire Larapinta trail.
The views from Counts Point are incredible and in my opinion, the best on the whole Larapinta walk. You have stunning views of Haasts Bluff and Mt Zeil (the highest point in the NT).
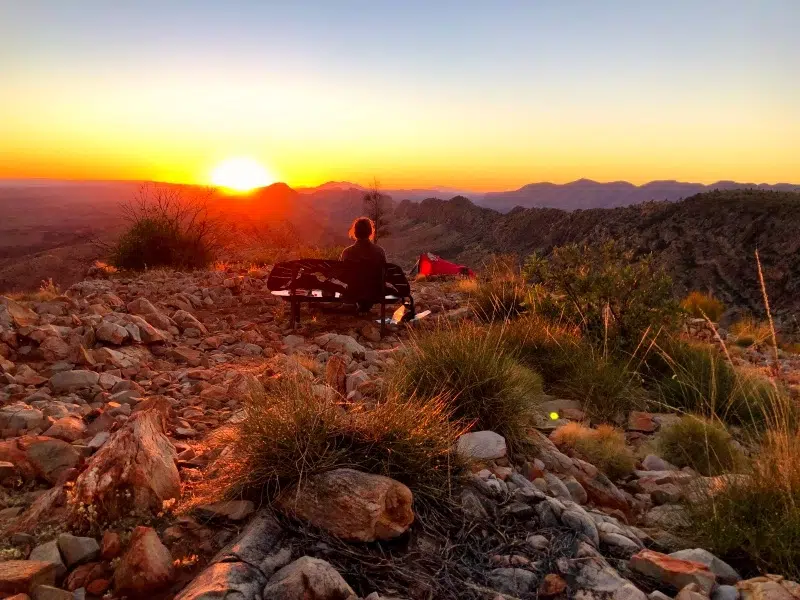
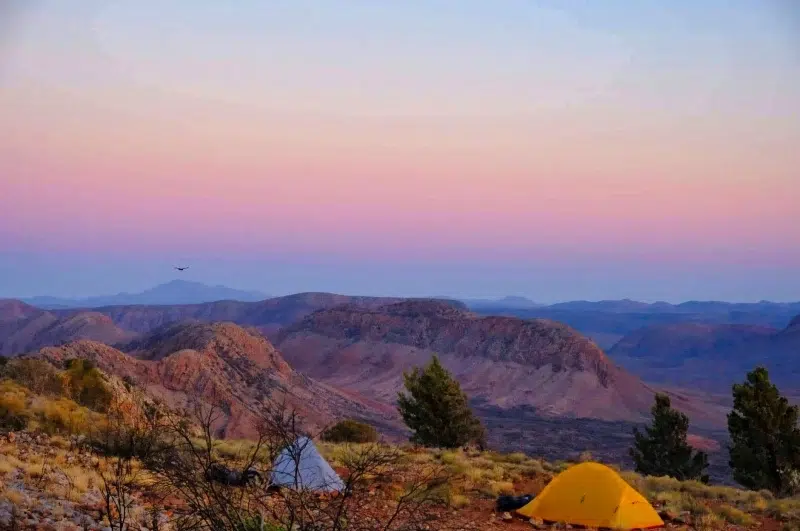
If the wind is in your favour, do make a stop to camp at Counts Point. The sunset from the top is incredible.
If the wind is blowing, camp elsewhere. (I’ve camped here a few times and I was almost blown off the mountain on one of the nights. Seriously.)
Section 9: Serpentine Chalet Dam to Ormiston Gorge
- Distance: 28.3 km
- Time: 10 – 12 hours. You will need to camp overnight. Hermit’s Hideaway is a fantastic spot to camp for the night.
- Difficult: Difficult
- Camping: Waterfall Gorge, Mt Giles Lookout, Hermit’s Hideaway and Ormiston Gorge
This is a hard section on the Larapinta Trail.
This section is steep, but what really makes it difficult is the lack of shade and water. There are long sections that are completely exposed (so time your departure so you’re not walking through the valley in the middle of the day) and there are no water tanks except for at either trailhead.
There is no reliable surface water along the way, so if you decide to walk this section you will have to carry a heavy pack with a two-day supply of drinking water.
We recommend carrying at least 6-7L of water per person for this section if you will be camping overnight at Hermit’s Hideaway (recommended).
If you want to camp on the ridge, you can choose between Mt Giles Lookout and Hermit’s Hideaway. I’ve camped at both and prefer Hermit’s Hideaway, as it has more shelter from the wind (and privacy).
When you get to Ormiston Gorge, you can have a shower!
Section 10: Ormiston Gorge to Finke River
- Distance: 9.1 km
- Time: 3 – 4 hours
- Difficulty: Easy
- Camping: Finke River
This is the shortest and easiest section of the Larapinta Trail.
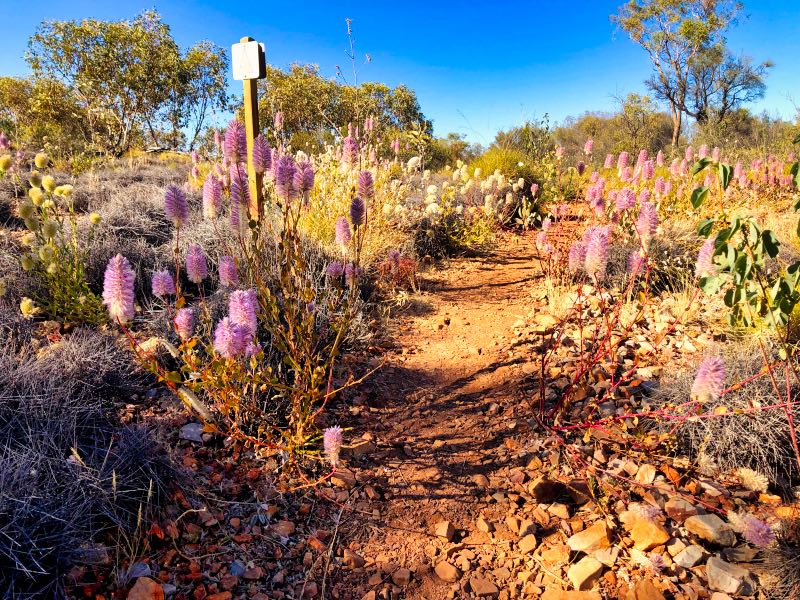
If there’s been a lot of rain the previous summer, then the valley is filled with wildflowers.
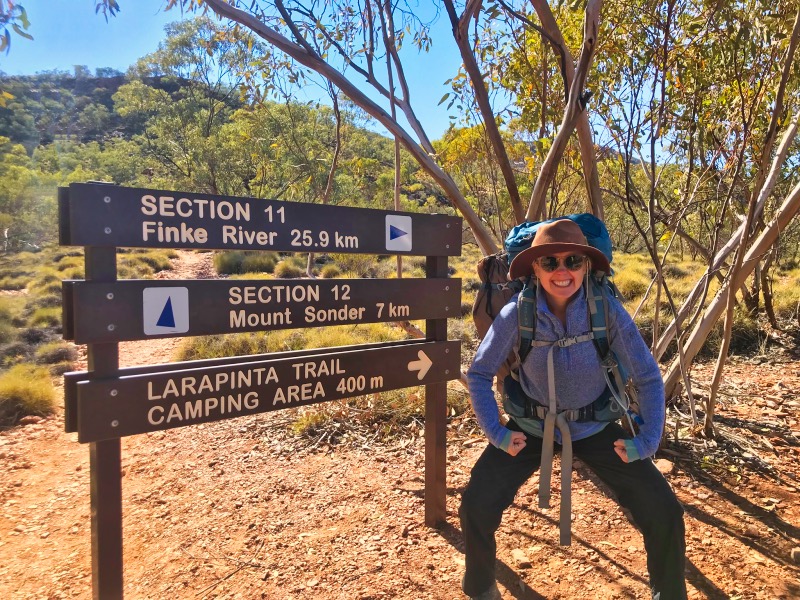
Section 11: Finke River to Redbank Gorge
- Distance: 26.3 km
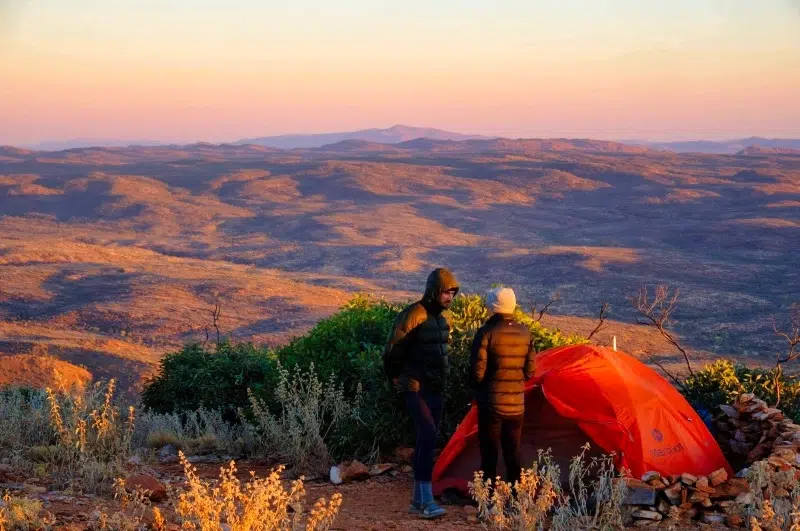
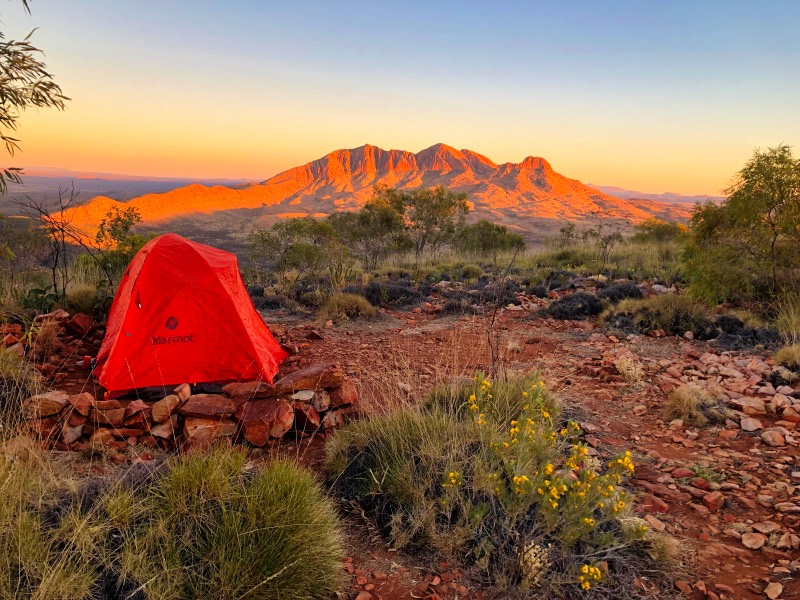
- Time: 9.5 hours. You will need to camp overnight. Hilltop Camp is a fantastic place to camp with the best view of Mt Sonder on the Larapinta Trail.
- Difficulty: Moderate
- Camping: Hilltop Lookout, Rocky Bar Gap and Redbank Gorge
This is a lovely section as you near the end of the trail.
Hilltop Lookout provides the best view of Mt Sonder on the entire trail. Sunrise is particularly amazing, and it’s worth a camp just to catch it (see photo below).
Section 12: Redbank Gorge to Mt Sonder return
- Distance: 15 km
- Time: 6 hours
- Difficulty: Moderate
- Camping: Redbank Gorge
I’ve climbed Mt Sonder at least 4 times and it’s always impressive. This is a great finale to your Larapinta walk.
Leave your pack at Redbank Gorge to climb Mt Sonder and enjoy the hike up Mt Sonder without your pack.
Larapinta Trail Itineraries
This is the challenging part: building your Larapinta Trail walk itinerary! As the Larapinta Trail is so long, with multiple campsites per section, there are endless itinerary variations you can make.
I met someone doing the Larapinta walk in as short as 7 days and another in as long as 20. Most people take around 14 – 16 days. If you are an experienced hiker in good shape, we recommend 14 -15 days, including a rest day.
Great places to camp that we recommend are Brinkley Bluff, Counts Point, Hermits Hideaway and Hilltop Lookout. It’s also great to camp at Standley Chasm, Ellery Creek South and Ormiston Gorge, all for their food drops and for the hot meals and showers at Standley Chasm and Ormiston Gorge.
Tips and tricks
Here are some tips and tricks for walking the Larapinta Trail. I did some of these and they greatly enhanced my experience. The others, I wish I had known about and followed.
1. Take a rest day
We highly recommend taking a rest day mid-way through the Larapinta walk. Ellery Creek South is a nice location to do so, as there are great facilities, a beautiful waterhole and it’s a food drop location, so you can stock up on nice food for the rest days.
I didn’t take a rest day and wish I had. At the 6-day marker, I found myself wanting a day of rest.
2. Brush up on your blister first aid
Make sure you understand blister hot spots and how to treat them before you set out on the Larapinta Trail. And always pack a well-stocked blister first aid kit.
Some key points to know:
- Your feet will swell, so ensure there’s enough space in your boots.
- Wear double socks. This helps the friction.
- Air your feet at every rest stop. This will help your feet dry out and reduce moisture which leads to blisters. Plus it feels nice!
- Treat a blister hot spot as soon as you feel it. My method: rub the area with alcohol (it dries it out), and put a blister patch on it. I also use tape to pre-emptively tape problem areas.
3. Bring a lightweight, packable blanket to sit on
You will want something to sit on and the Larapinta Trail is dusty. Having a lightweight blanket to rest on during those long days is a godsend.
4. Hydralites are your best friend
Pack lots of hydralites to add to your water. You’ll love it.
Not only does it replenish your electrolytes, but they’ll jazz up your water. When you’re only drinking water over 14 days, any change is welcome.
5. Pack dry biodegradable wipes
You will get dirty walking the Larapinta Trail. Very dirty. The endless red dust of Central Australia will find its way to every inch of your body and there are very limited opportunities to clean yourself.
We can’t recommend enough packing along some dry biodegradable wipes.
I didn’t bring these, but was gifted one by a fellow hiker, and let me tell you, it was one of my best moments on the Larapinta Trail. These bad boys are dry, so they’re light. Add a bit of water and you get a soapy lather to wipe off some of that trail grime. Heaven.
6. Assess the mouse situation beforehand
Mice can get really bad on the Larapinta Trail. Really bad. The year I did the Larapinta walk, in 2021, there was a full-on mouse plague and it only got worse the following year. Find out what the situation is before heading out.
If the little rodents are around, keep your food in dry bags and hang them from a string. The surface material of the dry bag is usually too slippery for them to crawl on. Never keep food in your tent – they will eat through the material.
7. Bring some cash
You’ll want some cash on hand to pay for camping at Standley Chasm, plus any food you might get there or at Ormiston Gorge.
You can even do your laundry at Standley Chasm for a small fee.
8. Save Some Time to Explore More of the Red Centre
Central Australia is so, so beautiful, with unlimited areas to explore. Save some time at the end of your Larapinta Trail walk to see some of the region’s gems.
Our favourites include a trip out to magical Palm Valley, Uluru and King’s Canyon (of course) and an early morning hot air balloon ride over Alice. (We haven’t done this last one, but everyone that has raves about it!).
What to Pack for the Larapinta Trail
Gear
- Good quality hiking backpack (men’s and women’s)
- Tent
- Sleeping pad
- Blow up pillow
- Sleeping bag
- Waterproof compression bag (for the sleeping bag)
- Stuff sack (for keeping clothes in while hiking)
- Headlamp
- Ground blanket
- Trekking poles
- Personal locator beacon (PLB)
Cooking
- Camp stove
- Cooking set (pot, bowls and mugs)
- 1 x 230 grams fuel canister (per food drop)
- Collapsible tea kettle (a luxury, but it’s worth it!)
- MSR MugMate Coffee Filter
- Spork
- Pocket knife
- Lighter and matches (in a waterproof bag)
- Water bladder
- Water bottle
Sanitation
- Steripen Ultra Rechargeable Portable UV
- Hand sanitizer
- Toilet paper
- The Deuce Backpacking Potty Trowel
- Hydralites / Electrolytes
- Biodegradable dish soap
- Mini sponge (just cut a regular one)
- Rubbish bags
Women’s Clothing
- Hiking boots
- Hiking pants
- Hiking top
- Long sleeve hiking shirt
- Merino underwear
- Sports bra
- Lightweight Merino socks (I’m a fan of wearing two pairs when hiking)
- Warm socks to wear at camp
- Fleece
- Down jacket
- Rain jacket
- Gloves
- Beanie / Toque
- Thermal top
- Thermal leggings
- Waterproof sandals
- Sunglasses
- Hat
- Buff
Men’s Clothing
- Hiking boots
- Hiking pants/shorts
- Sports t-shirt
- Merino underwear
- Lightweight merino socks (also a fan of the double socks)
- Fleece
- Thermal top
- Thermal bottoms
- Down jacket
- Gloves
- Beanie / Toque
- Waterproof sandals
- Sunglasses
- Buff
- Hat (full brimmed)
Personal
- Microfiber towel
- Eye mask
- Ear plugs
- Toothbrush
- Biodegradable toothpaste
- Biodegradable wet or dry wipes
- Blister first aid kit
- First aid kit
- Sunscreen
- Book / kindle
- Games to play at camp – deck of cards, or our favourite, Yahtzee
Electronics
- Phone and charging cables
- Power bank and/or solar panel
- Camera and/or GoPro plus charging cords
Where to stay in Alice Springs
Budget
A funky hostel vibe, with hammocks, pool and a bbq area.
Mid-range
Quest Alice Springs offers nice apartment suites with all the modern comforts.
High-end
If it’s luxury you’re seeking after walking the Larapinta Trail, then look no further than the DoubleTree. The DoubleTree is the most luxurious option in Alice Springs.
Hanuman, one of the on-site restaurants, has exceptional food and is pretty good value.
Like this post? Pin it for later!
Disclaimer: This post contains affiliate links. This means that if you buy or book anything through them, we’ll earn a small commission at no extra cost to you. This helps us run this website and create comprehensive guides to help you get off the beaten track. We only recommend products and/or services that we use ourselves and trust.
Lovely photos, I must say. And I so agree with cleaning your rubbish when you leave the place. The world would be so much better if even half of the world adhere to this.
We couldn’t agree more!
Wow, you have written such a great post with so much information. Thank you.
Thank you Kim!
This trail truly looks like a once-in-a-lifetime adventure! The landscape is just breathtaking! Would love to hike here one day 🙂
It’s definitely a once-in-a-lifetime experience. We hope you make it there some day 🙂
Beside the mice, did you encounter many other animals?
Not many, just some wallabies – they’re everywhere!
What a wonderful guide! Thank you for being such a great resource for hikes. I’m adding this to my list!
Thank you Deirdre! Let us know if you ever do it 🙂
Congratulation s on completing this end-to-end trek during the pandemic. I can’t think of a better place to be then in nature.
Thanks! It was a fantastic experience.
Even though, this type of hiking seems too challenging and hard for me it was a pure pleasure to read about this trail. A load of useful info!
Thanks Maria! We’re glad you enjoyed it 🙂
Wow, this looks like an amazing experience! I visited central Australia a few years ago and found it magical, and I’d love to go back. Your photos are so beautiful and I’d love to walk this trail. Thanks for sharing!
We hope you get back there and get to enjoy some of the Larapinta Trail some day.
What an absolutely amazing guide to the Larapinta Trail, there is everything here that you could possibly need to know…and the views are spectacular…
Thanks Jeanine! It’s true, the views on the Larapinta Trail are astounding.
I found your blog full of useful information. I (54) am planning on walking with my son (20) in July E-W and his work commitments means we have to do it in 12 days. I am struggling with our camping spots as I’d really like to camp at Hermits, Hill Top, Coutts, Brinkley and the recommend places. Do you have a 12 days walking itinerary you could please share? Currently I have the following listed but there are some long days here:
Simpsons Gap
Jay Creek (low route)
Standley Chasm
Birthday Waterhole
Hugh Gorge
Ellery Creek South
Serpentine Gorge
Serpentine Chalet dam
Hermits Hideaway
Hill Top Camp
Redbank Gorge
Or maybe you think this is quite doable? Would appreciate any advice – thank you
Hi Miranda! We’re so glad you found the blog useful. I think your plan is actually pretty good (considering the time you have) and I’m not sure I’d make any changes to it. Be sure to watch the wind forecast for Brinkley’s Buff and Count’s Point, because if it’s blustery, it’s a rough night up there!
It’ll definitely be a push to complete it in 12 days, but it sounds like you are up for the challenge! Please let us know how you go.
Hello do you have any recommendations on where to store a care safely in Alice ?
Hi Zari! I think your best bet would be to ask at one of the hotels in town or the caravan park just outside of town. Let us know if you have any luck and we’ll be sure to update the blog with the info. Happy hiking!