How to Conquer the Wolfberg Arch and Wolfberg Cracks
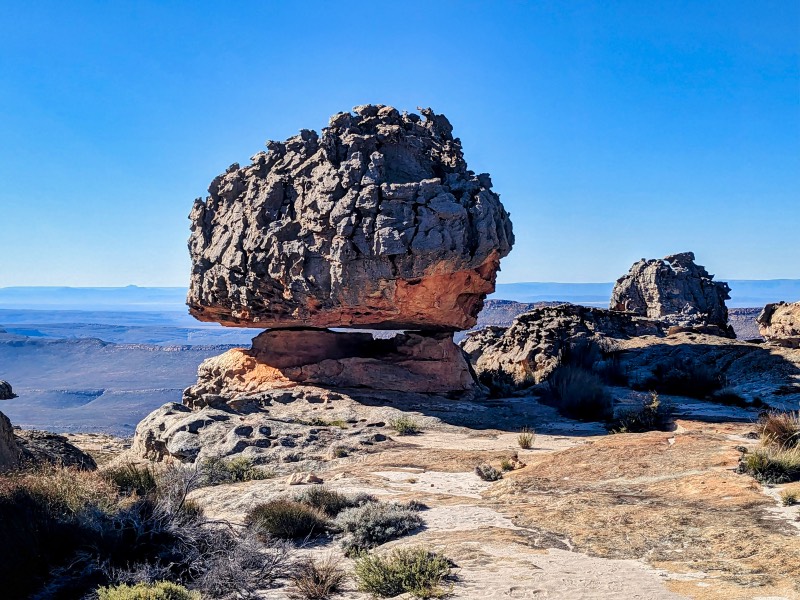
The Cederberg is one of South Africa’s top hidden gems. With untouched nature, unique rock formations, some of the best night skies in the world and endless hiking opportunities, it’s a great place to spend a couple of days (or weeks!).
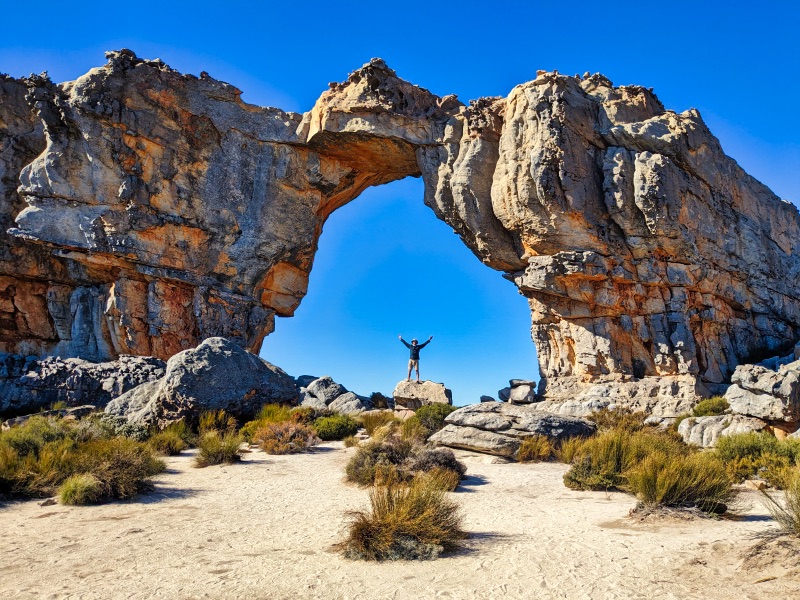
And of all the areas in the Cederberg, none is as spectacular as the region containing the Wolfberg Arch and Wolfberg Cracks.
The ‘Wolfberg Area’, containing these two iconic formations, is one of the most popular regions in the entire Cederberg.
And for good reason! The landscape in this compact area is simply breathtaking.
Want to find out more about hiking here? Read on for our complete guide to hiking the Wolfberg Arch and Wolfberg Cracks.
South Africa Travel Resources
- Read: Is South Africa Safe to Visit in 2025?
- Getting there: search for flights to South Africa
- Where to stay: search for hostels and hotels
- Getting around: search for buses
- Rent a car: search for deals on car rentals
- Travel insurance: get travel insurance for your trip
- Money: get a Wise travel card to save big-time
- Tours: check out the best South Africa tours
Wolfberg Arch and Wolfberg Cracks Location
The Wolfberg Arch and Wolfberg Cracks are located in the Cederberg Wilderness Area, approximately 270 km northeast of Cape Town.
The Cederberg is a vast place, but if you’re looking for a base to explore the Wolfberg Arch and Wolfberg Cracks, both Sanddrif Holiday Resort and Driehoek Guest Farm are great options.
Spending time in Cape Town? Explore Cape Town’s Coolest Neighbourhoods
How to Get to The Wolfberg Arch and Wolfberg Cracks
Unfortunately, there is no public transportation to the Cederberg, so self-driving is the only game in town.
If you don’t have your own set of wheels, you’ll need to rent a car to explore this area.
We’ve put together the most comprehensive guide to renting and driving in South Africa, so check it out so you’re fully prepared to hit the road in the Rainbow Nation!
Alternatively, if you’re going to be hanging around Africa for a while, why not consider buying your own car?
Read next: 15 Awesome Things to Do in Johannesburg
Best Time to Hike to the Wolfberg Arch and Wolberg Cracks
You can, theoretically, hike to the Wolfberg Arch and Wolfberg Cracks at any time of the year.
However, the best time to hike is dependent on whether you are hiking for the day, or as an overnighter.
If you’re doing a day hike, then either spring or autumn is a great time. During these seasons, the days will be mild and pleasant – excellent walking weather!
Check out Jonkershoek Nature Reserve for more great hiking near Cape Town
If you’re doing an overnight hike, spring is the best option. After the winter rains, there will be more surface water available, making it a much more pleasant experience.
As an added bonus, the wildflowers should be out in full bloom. Do note that the nights in the Cederberg can get quite cool, so be sure to pack some warm gear for the evenings.
You can hike to the Wolfberg Arch and Wolfberg Cracks in winter (as we did), however, this is the rainiest part of the year in the Cederberg and temperatures will be quite low (it can snow at higher elevations).
It’s no sweat for a day hike, but if you’re spending the night, you’ll need to be prepared.
So long as you have the right gear (both for rain and for cold weather), winter is a great option, as water will be more abundant on the trail.
What kind of gear should you bring for winter? A tent, a sleeping bag rated to at least 0C, an insulated sleeping pad, a down jacket, a rainjacket and some nice thermals. See our full packing list below.
Hiking to the Wolfberg Arch and Wolfberg Cracks in summer is not recommended, due to the high daytime temperatures (sometimes up to 40C) and the lack of good water.
Hiking to the Wolfberg Arch and Wolfberg Cracks: Route Options

There are two ways you can hike to the Wolfberg Arch and Wolfberg Cracks:
Wolfberg Arch and Wolfberg Cracks Day Hikes
There are 4 different options for day hikes to the Wolfberg Arch and Wolfberg Cracks. We’ve detailed each option below.
1. There-and-back from Sanddrif Parking Lot
Sanddrif Parking Lot – Wolfberg Cracks – Wolfberg Arch – Wolfberg Cracks – Sanddrif Parking Lot
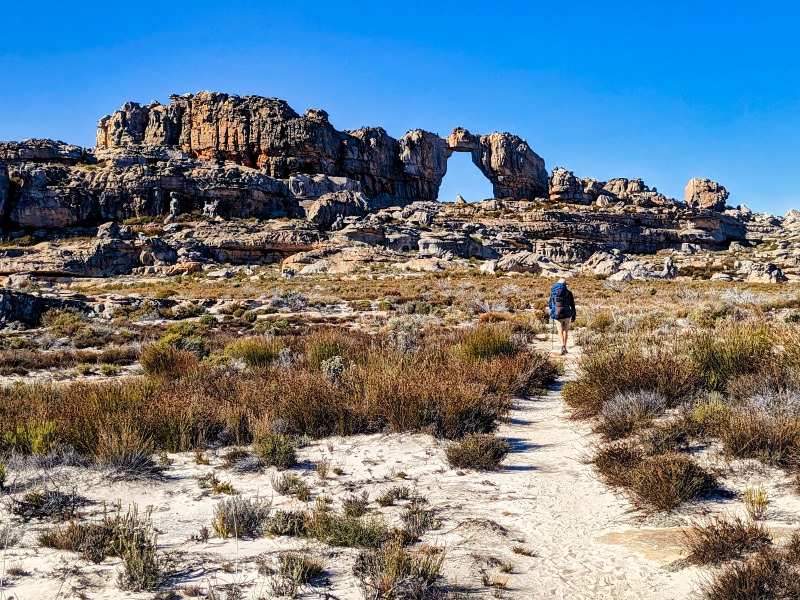
A hike to the Wolfberg Arch and Wolfberg Cracks from the Sanddrif Parking Lot is the most popular and direct option.
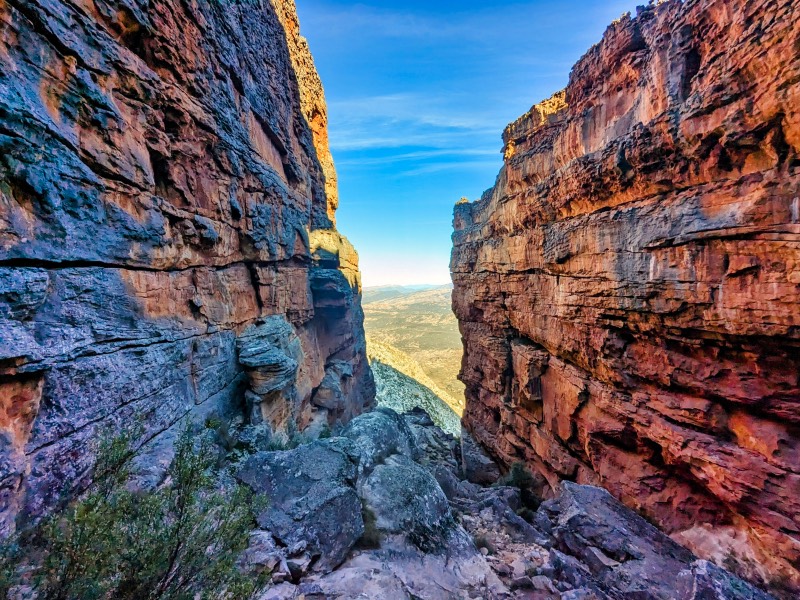
On this option, begin at the Sanddrif Parking Lot. Follow the trail up the Wolfberg Wide Cracks. Don’t attempt the Wolfberg Narrow Cracks unless you have rope and are experienced using it.
The trail up to the Wolfberg Cracks from the Sanddrif Parking Lot is steep (it’s about 530 metres of elevation gain over 2.5 km) but so long as you’re reasonably fit, it’s manageable.
To bolster your confidence, we’ve seen families with children doing it.
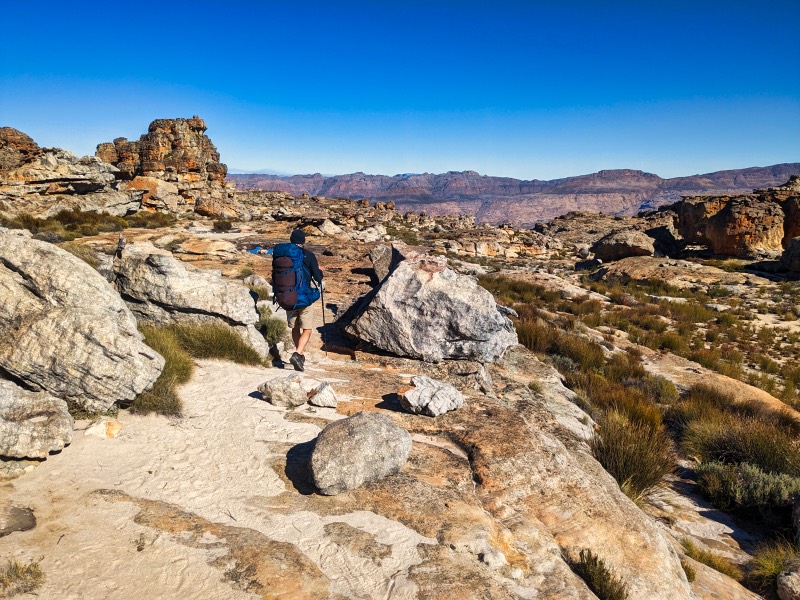
Once you reach the top of the Wolfberg Cracks, continue on the clear trail to the Wolfberg Arch. The trail is pretty well-defined and mostly flat.
Once you near the Wolfberg Arch, you’ll have another very small climb.
This section can be a bit confusing and akin to walking through a maze of boulders, however, there are cairns marking the way. Plus, the Wolfberg Arch is clearly visible, so just head in that direction.
From the Wolfberg Arch, backtrack to the start. Take your time descending from the Wolfberg Cracks, especially at the start, where there are some particularly big boulders to navigate.
Important: on this option, there is no water on the trail. Read more on water below.
2. There-and-Back from Driekhoek Guest Farm
Driekhoek Guest Farm – Gabriel’s Pass – Wolfberg Arch – Wolfberg Cracks – Wolfberg Arch – Gabriel’s Pass – Driehoek Guest Farm
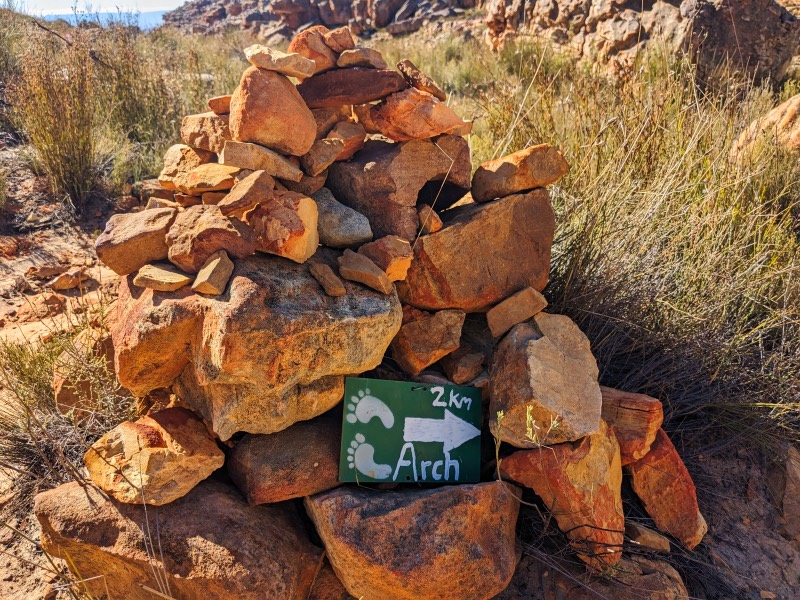
Starting at Driehoek Guest Farm, take the marked route up to Gabriel’s Pass. There are a number of signs on the property indicating, ‘Arch’. It’s also marked on maps.me.
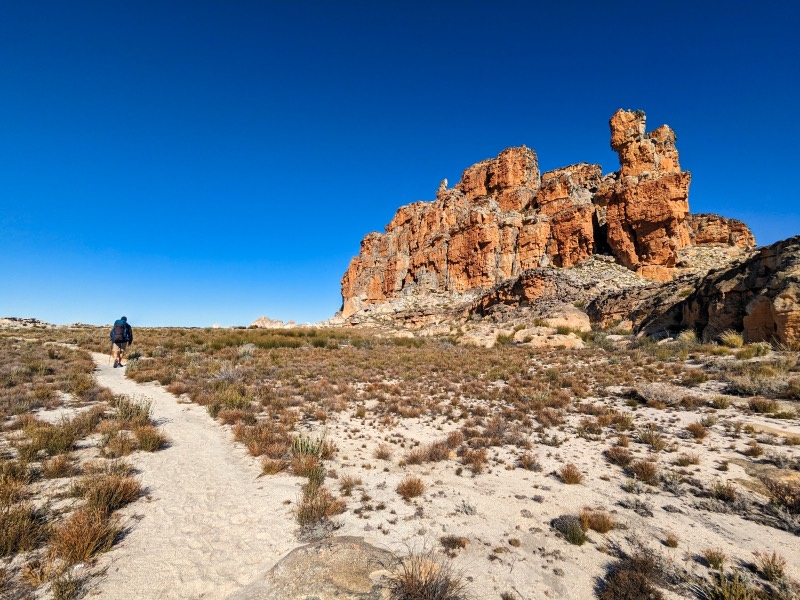
This section is part of the Cederberg Heritage Trail and is very beautiful.
You’ll hit a jeep track, but just continue straight up (north) Gabriel’s Pass. Again, there is a sign indicating the way, marked ‘Arch’.
From Gabriel’s Pass, take the trail splitting off to the right, heading in a south-easterly direction through the rocky mazes.
Again, the way is marked by ‘Arch’ sign. Once you’ve got on this trail, the path to the Wolfberg Arch is marked by cairns.
From the Wolfberg Arch, walk on the path to the Wolfberg Cracks. Again, this section is like walking through a maze of rocks and boulders.
It’s relatively easy to follow, with occasional cairns to mark the way, but if you get lost, the trail is marked on maps.me.
From the Wolfberg Cracks, backtrack to the start at Driehoek Guest Farm.
Read next: Blyde River Canyon 3 Day Hike: Essential Guide
3. Loop, beginning from Sanddrif Parking Lot

Sanddrif Parking Lot – Wolfberg Cracks – Wolfberg Arch – Gabriel’s Pass – Jeep Track – Sanddrif Parking Lot
From the Sanddrif Parking Lot, follow option #1 until the Wolfberg Arch. From the Wolfberg Arch, continue on the trail northwest towards Gabriel’s Pass.
If you’re using maps.me, head on the trail towards “Gabrielskloof”.
At Gabriel’s Pass, take a left at the ‘Arch’ sign (southwest) to descend through a beautiful cedar forest.
Once you’ve cleared the Cedar Forest, the trail hits a jeep track (marked as ‘Die Trap’ on both maps.me and the Slingsby map).
Take a left (south) to follow the jeep track all the way back to the Sanddrif Parking Lot.
Honestly, the jeep track is not the most inspiring hiking, but it enables you to do the Wolfberg Arch and Wolberg Cracks in a loop, which is nice.
4. Driekhoek Guest Farm to Sanddrif Parking Lot (or vice versa)
Driekhoek – Gabriel’s Pass – Wolfberg Arch – Wolfberg Cracks – Sanddrif Parking Lot
Whilst you can do this option in either direction, it’s best to do it in the Driekhoek to Sanddrif direction.
Why this direction? Because you get to see the Wolfberg Arch all at once and it’s much more dramatic.
For this option, you’ll need a car at each end. You could try your hand at hitchhiking back to your car, but unless it’s peak season, you may have to wait a while.
From Driehoek Guest Farm, follow the steps on option #2. From the Wolfberg Cracks, instead of backtracking to Driekhoek, descend via the Wide Crack to Sanddrif Parking Lot.
Wolfberg Arch and Wolfberg Cracks Overnight Hikes
Any of the above can be done as an overnight option. If you’re into camping and love spending a night out in nature, we can’t recommend this enough.
This is a pure wilderness area and there are absolutely no facilities at the Wolfberg Arch or Wolfberg Cracks, so, unless you go with an organised tour, you will need to be entirely self-sufficient.
That means carrying whatever camping gear you require, plus your food and water for the night.
Don’t worry, here’s our complete packing list of what we take into the mountains.
Read about more of South Africa’s Hidden Gems
The Wolfberg Arch or the Wolfberg Cracks: Where Should You Camp?
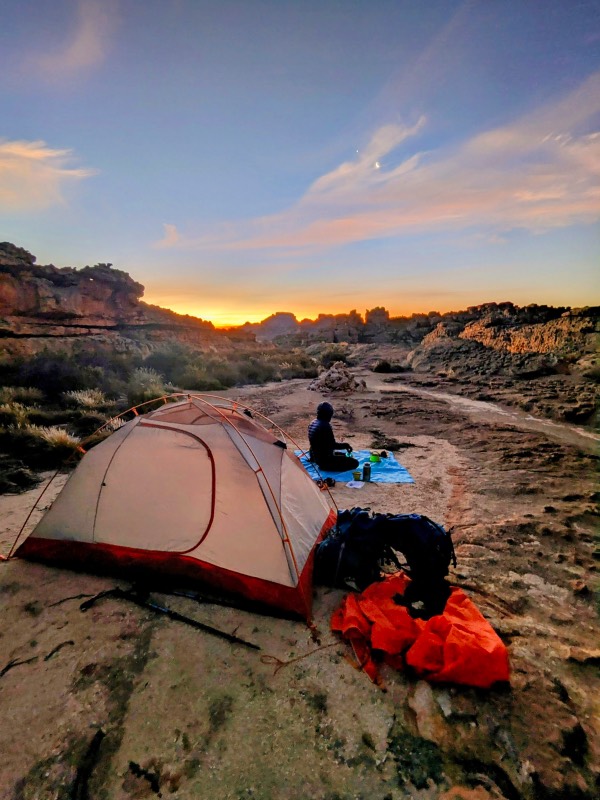
In our opinion, the best place to spend the night is at the Wolfberg Arch.
Why? There are some great pitches right at the Wolfberg Arch, making it an incredible place to camp. The lighting on the Wolfberg Arch at sunset is absolutely magical.
There are some nice places to camp at the Wolfberg Cracks, however, we much preferred the pitches at the Wolfberg Arch.
Wolfberg Arch and Wolfberg Cracks Overnight Hike: Recommended Routes
To tackle an overnight hike through the Wolfberg Arch and Wolfberg Cracks, we recommend either option #2 or #4 above – essentially, approaching from the Driehoek side. This is due to the water situation along the route.
There’s no water on the Sanddrif / Wolfberg Cracks side, so for an overnight hike, you’ll have to carry it all from Sanddrif.
It’s a steep climb up the Wolfberg Cracks from the Sanddrif Parking Lot, so if you’re carrying an extra 3L of water in addition, this would suck.
If you approach from Driehoek, you can fill your water up at Gabriel’s Pass and then only have to carry it a short while.
Just note that the water isn’t particularly nice, so you will need to carry a water bladder and a water purification device.
Read: A Complete Guide to Visiting Golden Gate National Park
Wolfberg Arch and Wolfberg Cracks Hiking Essential Information
Permits
A permit is required to hike to the Wolfberg Arch and Wolfberg Cracks. You can grab this from the Sanddrif Reception before you start your hike.
Navigation
The Wolfberg Arch and Wolfberg Crack trail is relatively easy to navigate.
Except for the few ‘Arch’ signs on the Driehoek side, there are no signs, but for the most part, there is a clear trail to follow.
There is a digital map of the trails on maps.me, which we highly recommend you download in advance.
You’ll also find trails on AllTrails, our go-to app for reliable trail maps and navigation and Wikiloc. We recommended downloading these in advance as well. You can never have too many maps!
The Slingsby “Hiking the Cederberg” map is also very helpful in navigating the trail.
Not only does it show the various route options, but also various water points and points of interest.
You can pick one of these up at various bookstores in Cape Town, Outdoor Warehouse and Camp and Climb.
Water
There is very little surface water on the trail to the Wolfberg Arch and Wolfberg Cracks.
The only water point along the entire trail is at Gabriel’s Pass.
This is slightly off-trail and will require you to make a 500-metre detour down the pass. The waterpoint is marked on maps.me and on the Slingbsy map.
Do note that this water can get particularly nasty (we’re talking green, stagnant and filled with tadpoles), so you will absolutely need a water purification device.
As a note of confidence, we used our Steripen to treat it and had no problems. It was a life-saver, to say the least!
If you’re overnighting, you’ll also want a water bladder to carry enough water to last you the day and night. We recommend 3L per person.
Food
If you are going for an overnight hike to the Wolfberg Arch and Wolfberg Cracks, you need to bring all your own food for the duration of the hike.
Think light and easy to prepare.
For dinners, our favourite options are instant noodles, hardboiled eggs (they’ll last for up to 3 days) and quick-cooking pasta packages.
Dried fruit, nuts and granola bars are great for snacks.
For breakfast, we make our own instant oatmeal mix with lots of dried fruit, chia seeds and nuts inside, served alongside instant coffee and powdered milk.
If you’re after hiking meals, we love Mama Alles. The meals are delicious, affordable, filling and nutritious! (Our personal favourite is the Moroccan Tagine).
They’re cheapest at Camp and Climb, but can also be found at Outdoor Warehouse.
Rubbish
Pack it out! You must pack out all your own rubbish while hiking to the Wolfberg Arch and Wolfberg Cracks. Carry a few small bags (double bag it just in case of leaks) and carry it with you.
The Deuce Ultralight Trowel is a great hiking tool that allows you to Leave No Trace cleanly.
Pro tip: to minimise rubbish on the trail, decant as much of your food beforehand as possible.
Safety
Aside from general hiking safety, there are no specific safety issues on the Wolfberg Arch / Wolfberg Cracks hike.
As with all wilderness hikes, you should always carry a first-aid kit (complete with a snakebite bandage) and be mindful of snakes and scorpions.
Be sure to shake your boots out in the morning before putting them on!
Leopards are common in the Cederberg, but fear not – there has never been a reported attack on a hiker. If you’re lucky, you may see tracks!
Accidents happen, even on the best hikes, so having solid travel insurance is a must.
We personally use and recommend SafetyWing for its reliable coverage, including for hiking adventures—peace of mind is worth it.
Mobile Reception and Electronics
There is no reception at the Wolfberg Arch or Wolberg Cracks, so make sure to download any offline maps you may need.
For overnight hikes, a power bank is a must to keep your devices charged—whether you’re using maps or taking photos, you don’t want to run out of battery.
Further Hiking Resources
For more information on these trails (and beyond) we highly recommend the book Hiking Trails of South Africa. It’s a great resource for exploring South Africa on foot!
Where to go after The Cederberg?
From the Cederberg, you have some great options to continue your Southern Africa adventure.
Explore all Our South Africa Guides
Disclaimer: This post may contain affiliate links. If you buy or book anything through them, we’ll earn a small commission at no extra cost to you. Thank you for supporting this website!