The Complete Guide to Hiking Mt Arthur (2024)
Little known except amongst Nelson locals, Mt Arthur is a great little mountain tramp set in beautiful Kahurangi National Park.
Whether you tackle it as a long day hike from Nelson, or combine it with a longer multi-day tramp through the park, a hike to Mt Arthur is a great way to take in the surroundings of the stunning Tasman Region.
Considering a hike up good ol’ Arthur? Well then, read on for our complete guide to hiking Mt Arthur.
New Zealand Travel Resources
- Getting there: search for flights to New Zealand
- Guidebook: pick up a Lonely Planet New Zealand guidebook
- Where to stay: search for hostels and hotels
- Getting around: search for buses
- Rent a car: search for deals on car rentals
- Travel insurance: get travel insurance for your trip
- Money: get a Wise travel card to save big time in New Zealand
- Tours: check out the best New Zealand tours
Mt Arthur: Overview
- Location: Kahurangi National Park, Nelson/Tasman Region, South Island
- Length: 19 km return
- Time: 1 – 2 days
- Season: November – April
- Gateway city: Nelson
- Type: There-and-back
- Booking Required: No
- Sleeping: Huts and camping
- Start: Flora car park
- Finish: Flora car park
- Difficulty: Moderate
- What to expect: Beech forest, ridgelines, stunning views of the Tablelands and the Tasman Bay
Mt Arthur Location
Mt Arthur is located in Kahurangi National Park in the northwest corner of the South Island of New Zealand.
The closest town to Mt Arthur is the lovely seaside town of Nelson, which is also conveniently a great base to get yourself organised for a hike into Kahurangi National Park. Nelson is 75 km, and about 1.5 hours drive, from Flora car park (the start of the Mt Arthur hike).
Want another hike in Kahurangi National Park? Check out The Heaphy Track
Mt Arthur: The Trail

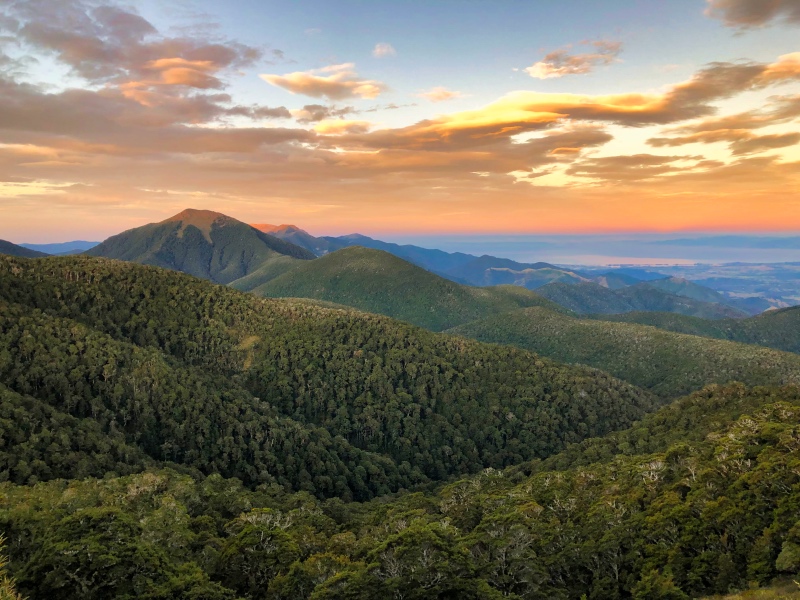
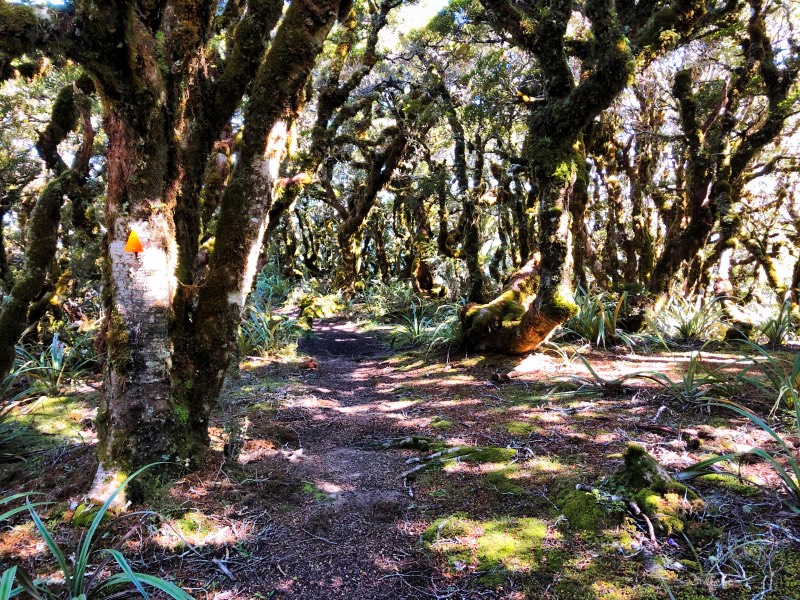
The hike to Mt Arthur is a 19 km there-and-back hike that involves ascending through beech forest to the bush line, where little Mt Arthur Hut is located. From there, you’ll walk on a clear path on an exposed ridgeline to the summit of Mt Arthur.
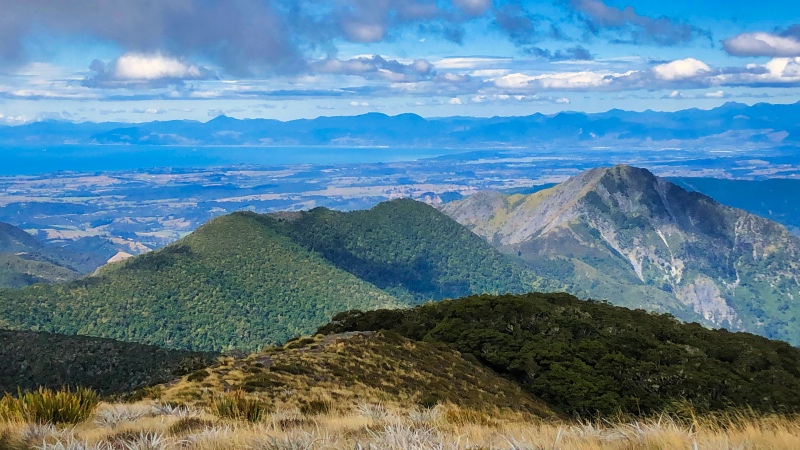
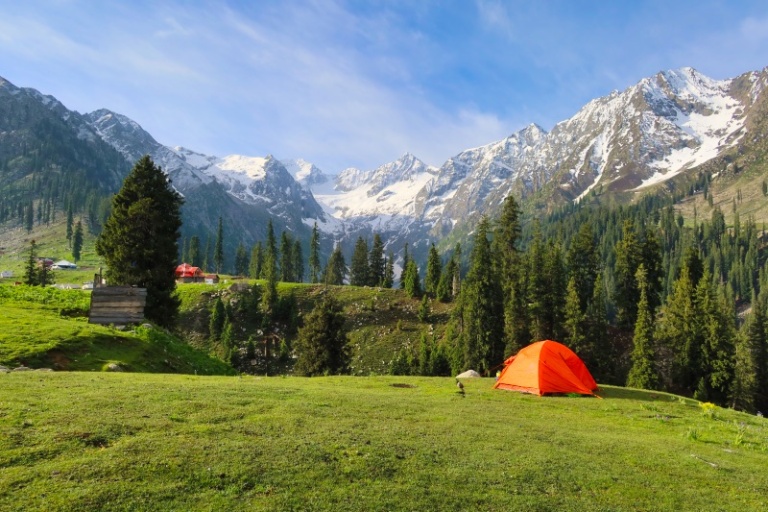
If you’re lucky and it’s a clear day, you’ll be treated to magnificent views of the Tablelands and the Tasman Bay.
The Mt Arthur hike is both a lovely day hike or an overnight tramp, depending on your personal preference and the amount of time you have to play with.
Read about The Travers Sabine Circuit, the best hike in Nelson Lakes National Park
Additional Hiking Around Mt Arthur
If you want to go a bit further into the Tablelands, there are a number of hikes you can do in the Mt Arthur region, many of which can be mixed and matched to create different itineraries – far too many for this blog to detail!
A particularly good overnight circuit, and one that we can personally recommend, is the Tableland Circuit.
Read our full guide on the Tableland Circuit
If you have more time on your hands, hiking past Balloon Hut into the Cobb Valley is also an excellent way to spend a few days in the beautiful Mt Arthur region.
Best time to Hike Mt Arthur
The best time to hike Mt Arthur is from December to February. This is during New Zealand’s summer and you can expect warm days with pleasant evenings.
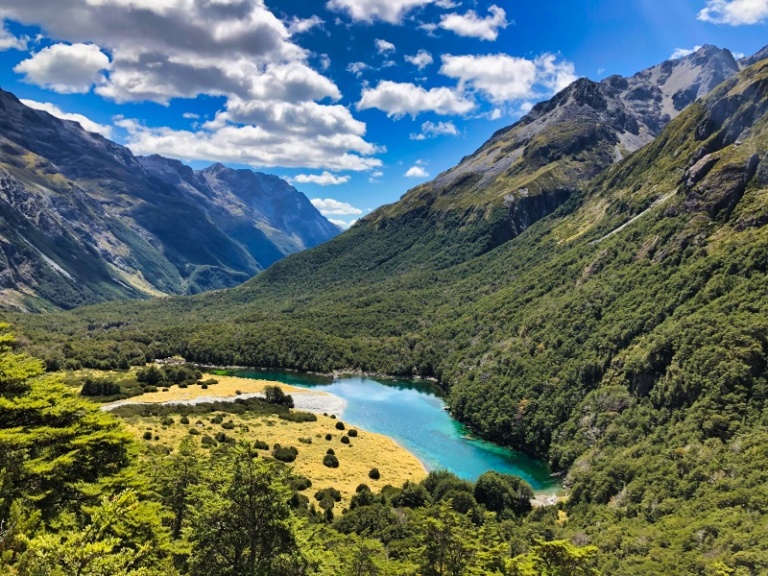
Read next: How to Visit Blue Lake Nelson
Unlike many other New Zealand hikes, Mt Arthur is open year-round and you are able to walk the trail during the winter months (June to August).
During the winter, the weather will be cooler and wetter, so make sure you’re prepared for these conditions.
Do You Need to Book Mt Arthur?
No, you do not need to book the hike to Mt Arthur in advance – nor can you for that matter! It’s simply a first-come, first-serve matter.
Although you cannot book Mt Arthur hut in advance, you must pay for the hut in advance.
To stay in any of the huts in the Mt Arthur region (including Mt Arthur hut), you must use either backcountry hut ticks or a backcountry hut pass. If you would like to camp outside Mt Arthur Hut, you also pay via a backcountry ticket. These are placed in the honesty box inside the hut.
Backcountry tickets can be purchased from any Department of Conservation (DOC) office. The DOC office in Nelson is centrally located and has very helpful staff who can answer any questions you may have.
Related: Angelus Hut – New Zealand’s Most Beautiful Hut
How to Get to Flora Car Park
The hike to Mt Arthur starts from Flora car park, so this is where you need to get to (and leave from).
Car
If you have your own wheels, it’s an easy, 1.5 hour drive to Flora car park from Nelson.
Don’t have your own set of wheels and need to rent a car? We personally use and recommend Discover Cars.
The access road to Flora car park (Graham Valley Road) is steep and narrow! During the summer, you should be fine in any car (we drove up in a Volkswagon Golf). During the winter, however, it’s a different story, so seek advice from the DOC office in Nelson before heading out.
Trek Express Shuttle
Trek Express offers shuttle services from Nelson to many of the surrounding trailheads, including both Flor car park. To Flora car park it costs $60 NZD pp and a minimum of 5 people are needed to make a trip.
Trek Express has a helpful ‘existing trips’ page on its website where you can find a list of upcoming trips to join if you don’t have the requisite numbers to charter a shuttle.
Hitchhiking
If you don’t have your own set of wheels, you can always try your hand at hitchhiking to/from Flora car park.
Hitchhiking, especially among hikers, is relatively common in NZ, so drivers are used to seeing and picking up people who need lifts. However, that said, there seems to have been an increase in hitchhikers in recent years, meaning increased competition for a valuable seat.
Our hunch is that it’s much easier to get a lift from Flora car park, as most drivers leaving Mt Arthur will be heading into Nelson (but not all drivers out of Nelson will be heading to Flora car park, which is quite remote).
As a note of confidence, when I finished hiking the Tableland Circuit, I managed to get a lift within 1 hour. We even stopped for a real fruit ice cream en route!
How much does it cost to hike Mt Arthur?
There are no fees to enter New Zealand National Parks or to use the trails. If you’re just heading out for the day, well then, it’s a cheap one for you!
If you are spending the night, you must pay to use Mt Arthur Hut or to camp outside the hut. Mt Arthur Hut costs $25 NZD pp per night and camping costs $10 NZD pp per night.
Outside of these fees, you will also have to pay for your food, supplies and transportation to/from Nelson.
How difficult is the hike to Mt Arthur?
As always, this depends on your experience. Overall, the hike to Mt Arthur is moderately difficult and can be done by anyone with a reasonable degree of fitness.
From Flora car park to Mt Arthur Hut, the trail is steep but well-graded and well-defined. From Mt Arthur Hut to the summit of Mt Arthur, the trail is exposed and on a ridgeline, but again, there is a very clear trail to follow.
What to expect at Mt Arthur
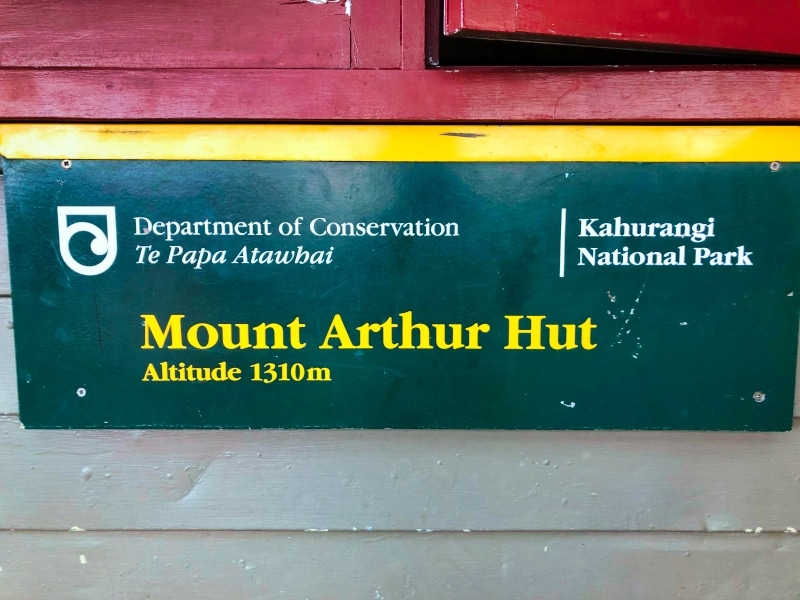
Mt Arthur Hut
Mt Arthur Hut is a very tiny little hut, set in a little clearing just below the bush line. There is a wood stove for heating, but no cooking facilities, so ensure you bring your own supplies. Fuel canisters can be purchased around Nelson at a number of places, but we found MD Outdoors to have the best prices.
There is intermittent mobile reception at Mt Arthur Hut, but more importantly, no sandflies!
Camping at Mt Arthur Hut
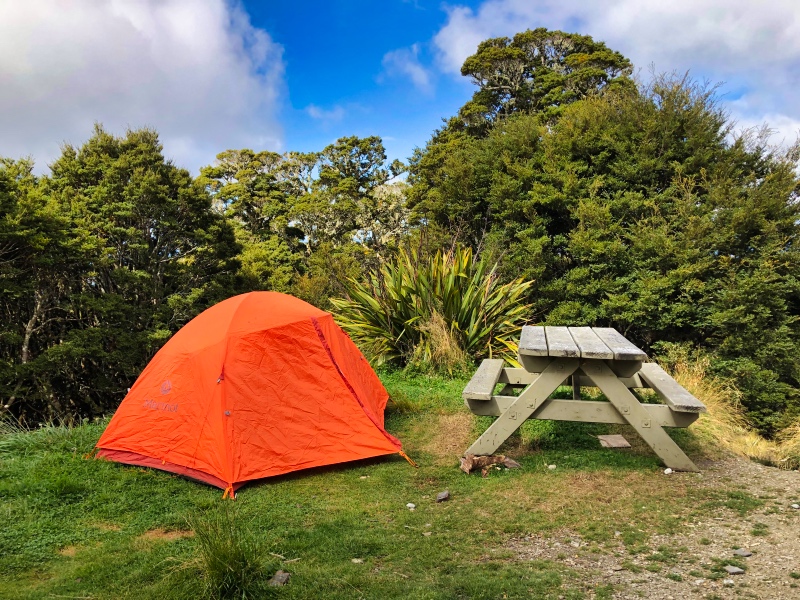
Camping is permitted at Mt Arthur Hut, but do note that there is very little space (essentially space for one tent near a picnic table).
Apparently, there have been times when there’s up to 4 tens – oh boy, I would hate to be there then!
Weather

The weather in New Zealand is infamously changeable and this changeability is even more pronounced in Kahurangi Nationa Park. Be prepared for 4 seasons in one day when you hike Mt Arthur!
Up on the ridgeline, the weather can be atrocious – we’re talking strong winds and poor visibility. If you start to head out and it’s looking nasty, consider turning around.
I hiked in the Mt Arthur region in February (high summer) and I had it all – wind, rain, cold and sun. For this reason, we always recommend packing for all weather. Don’t worry, we’ve got you covered. See our packing list below.
Water
There is water available at both Flora car park and at Mt Arthur Hut. Both of these should be treated, as this is sitting rainwater and can be contaminated by bird and possum droppings.
Pro tip: for treating water on all our hikes, we use a Steripen – it’s a game-changer.
There isn’t any water on the trail from Mt Arthur Hut to Mt Arthur summit, so be sure to fill your water bottles before heading off for your summit push.
Food
There are no facilities to purchase food on Mt Arthur, so you must bring all the food you need for the duration of your trek.
Backcountry meals are very popular, because they are light and easy to prepare, if not a bit expensive. They can be purchased at many places in Nelson, including the supermarket and specialty outdoor stores. We prefer the Radix Meals, which can be found at MD Outdoors.
If you would like to prepare your own food, instant noodles, pouches of beans, chickpeas and tuna, couscous and instant pasta packages are all great options.
Pro tip: add dehydrated shitake mushrooms to your meals. They’re lightweight and have a lot of nutrition. They can be purchased at the supermarket and need to be soaked in cold water for 20 minutes before being cooked. (We actually discovered this trick from watching other hikers whilst on the Heaphy Track.)
Rubbish
Pack it out, folks! Make sure to bring a bag to collect your garbage and take it out with you. Please, please do not throw your rubbish out on the trail or leave it in the huts.
Pro tip: to minimise rubbish on the trail, decant as much of your food beforehand as possible.
Navigation
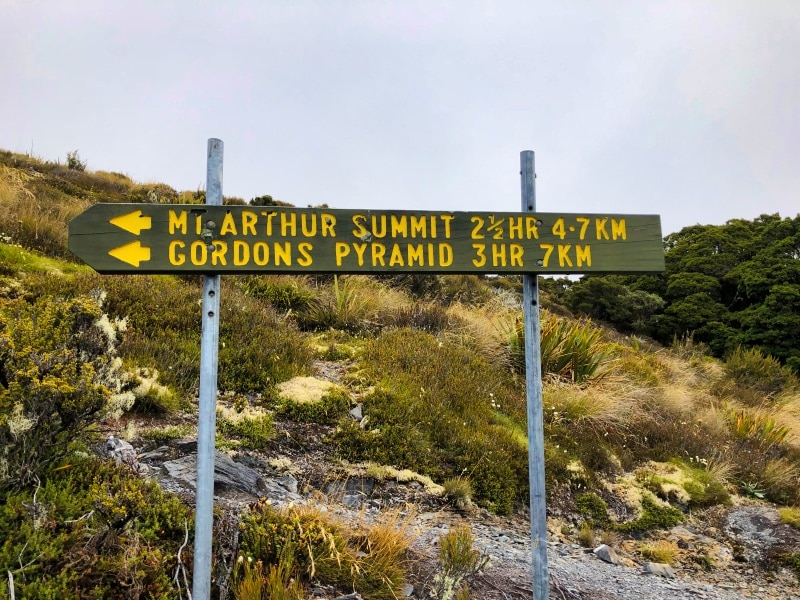
It is easy to navigate around Mt Arthur. There are numerous, clear trail markers along the trail which are easy to follow.
You don’t need a physical map, but it is a very good idea to download the maps.me trail in advance.
Safety
Tramping in the Mt Arthur region is relatively safe, with the standard mountain hazards.
Your biggest risks are inclement weather (as the climb to Mt Arthur goes along a ridgeline that is relatively exposed) and injury. Always pack a well-stocked first aid kit in case anything goes wrong and it’s never a bad idea to hike with a personal locator beacon (PLB) or similar device in case of any emergencies.
Travel insurance, as always, is essential. If something goes wrong, you want to be covered. We use and recommend SafetyWing. Trust us, we’ve used a lot of travel insurance and they really are the best.
Mobile Reception and Electronics
There is very limited mobile reception around Mt Arthur, so do not depend on it. There is intermittent reception at Mt Arthur hut, but it is just that – intermittent.
There are no places for charging your electronics on the trail, so we recommend bringing a power bank to keep your devices fully juiced.
Mt Arthur Hike Section Breakdown

Section 1: Flora Car Park to Mt Arthur Hut
- Distance: 4.2 km
- Elevation: +380m
- Time: 1 – 1.5 hours
- Difficulty: Easy
The path from Flora Car Park to Mt Arthur Hut is steep, but on a well-graded and well-maintained path. It’s very pleasant walking and only takes an hour or two (depending on how much you’re carrying).
Section 2: Mt Arthur Hut to Mt Arthur
- Distance: 4.65 km
- Elevation: +480m
- Time: 1.5 – 2 hours
- Difficulty: Moderate
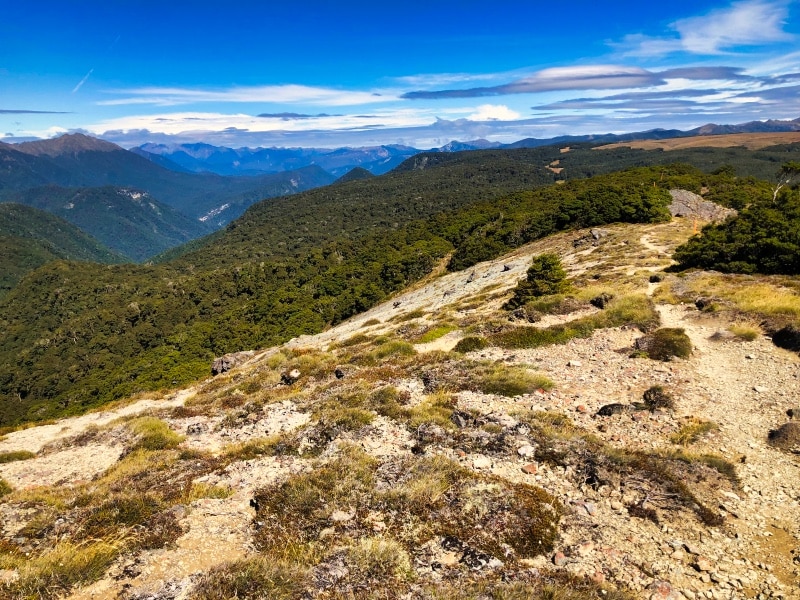
From Mt Arthur Hut to the Mt Arthur summit, the trail is actually okay. It’s steepish, but not terribly so. It’s also on an exposed ridgeline but there’s a very clear trail to follow.
Along the way, you’ll have great views and on clear days you can see the Tasman Bay in all her glory.
Do note that the weather on the ridge can be terrible with little to no visibility, so do take care and only set off if it’s looking pleasant.
Once you’ve reached the summit, then just simply turn back the way you came!
Tips and Tricks
- Use hiking poles. These bad boys are useful in so many situations – ascending, descending or testing out mud depth!
- Bring earplugs for the huts. Trust us on this.
- Bring sandals, crocs or any comfortable footwear for the huts. Your feet will thank us.
Packing List
Gear
- Good quality hiking backpack (men’s and women’s)
- Raincover for backpack
- Tent
- Sleeping pad
- Blow up pillow
- Sleeping bag
- Waterproof compression bag (for the sleeping bag)
- Stuff sack (for keeping clothes in while hiking)
- Headlamp
- Ground blanket
- Dry bag
- Trekking poles
- Personal locator beacon (PLB)
Women’s Clothing
- Hiking boots
- Hiking pants
- Hiking top
- Long sleeve hiking shirt
- Merino underwear
- Sports bra
- Lightweight Merino socks (I’m a fan of wearing two pairs when hiking)
- Warm socks to wear at camp
- Fleece
- Down jacket
- Rain jacket
- Gloves
- Beanie / Toque
- Thermal top
- Thermal leggings
- Waterproof sandals
- Sunglasses
- Hat
- Buff
Men’s Clothing
- Hiking boots
- Hiking pants/shorts
- Sports t-shirt
- Merino underwear
- Lightweight Merino socks (also a fan of the double socks)
- Fleece
- Thermal top
- Thermal bottoms
- Down jacket
- Gloves
- Beanie / Toque
- Waterproof sandals
- Sunglasses
- Buff
- Hat (full-brimmed)
Cooking
- Camp stove
- Cooking set (pot, bowls and mugs)
- 1 x 230 grams fuel canister
- Collapsible tea kettle (a luxury, but it’s worth it!)
- MSR MugMate Coffee Filter
- Spork
- Pocket knife
- Lighter and matches (in a waterproof bag)
- Water bladder
- Water bottle
Sanitation
- Steripen Ultra Rechargeable Portable UV
- Hand sanitizer
- Toilet paper
- Hydralites / Electrolytes (if you can’t find, salt and powdered juice packets work a treat)
- Biodegradable dish soap
- Mini sponge (just cut a regular one)
- Rubbish bags
Personal
- Eye mask
- Ear plugs
- Toothbrush
- Biodegradable toothpaste
- Deodorant paste (decanted into a small container)
- Blister first aid kit
- First aid kit
- Sunscreen
- Lip balm with SPF
- Book / kindle
- Games to play at camp – deck of cards, or our favourite, Yahtzee
Electronics
- Phone and charging cables
- Power bank and/or solar panel
- Camera and/or GoPro plus charging cords
Where to stay in Nelson Before and After the Hike
Budget
Mid-range
High-end
Disclaimer: This post contains affiliate links. This means that if you buy or book anything through them, we’ll earn a small commission at no extra cost to you. This helps us run this website and create comprehensive guides to help you get off the beaten track. We only recommend products and/or services that we use ourselves and trust.
Thanks very much, some helpful hints for sure and I hope I can make it when I try it next week. I haven’t tramped in years so I’m a bit daunted by ‘steep’ with a pack as we’re going to stay the night but we can just take our time as it’s not a long walk at least.
You can definitely do it!